for expert insights on the most pressing topics financial professionals are facing today.
Learn MoreCaring for your clients’ financial lives sometimes takes a village. Many clients have advisors, accountants, tax professionals, attorneys, and even other family members who contribute to their financial well-being. That’s why eMoney has the Alliance Partners feature, a solution that helps bridge the gap between advisors, clients, and professionals involved in tending to their financial futures.
Adding Alliance Partners allows you to share and manage important client data with the other financially relevant individuals in your clients’ lives. You can grant a customized set of client data from within the Vault, Reports, and Client Dashboard.
To begin, first go to your Advisor Settings and select the Alliance Partner tab.
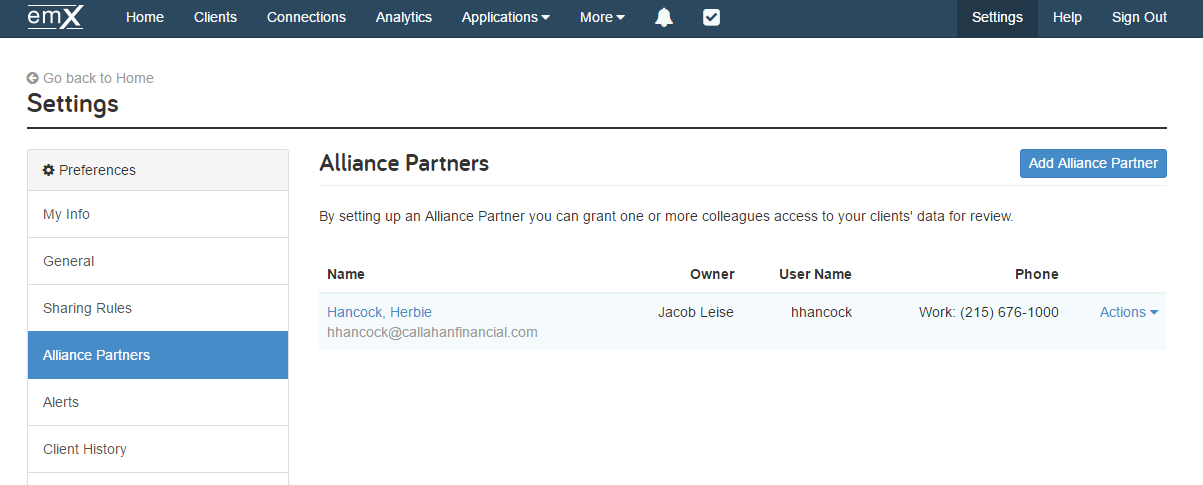
Click the blue “Add Alliance Partner” button to input the relevant contact information and to create a login User Name and Password.

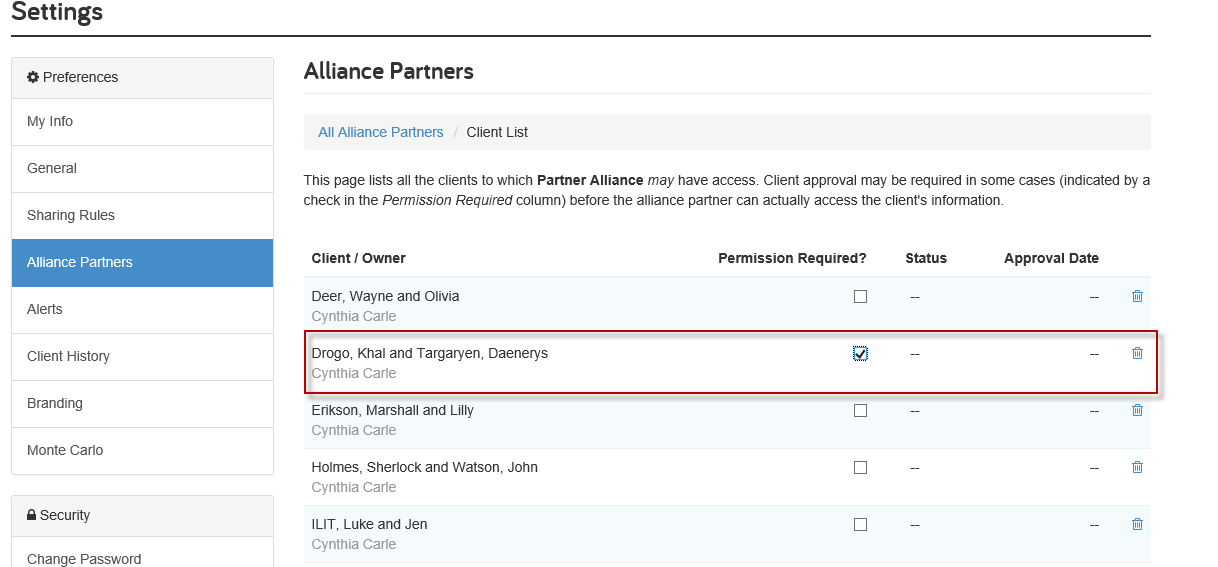
Once you’ve created the Alliance Partner’s access, click the Actions dropdown menu next to their name and select “Client List.” Here, you will be able to select the clients this Alliance Partner can view. Advisors can also opt to check the “Permission Required” box to indicate client approval is required before Alliance Partners can actually access the client’s information (note: this action would be performed by the Client under their Privacy Settings on the Client Site).
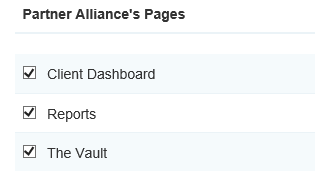
Once you’ve determined which clients you want this Alliance Partner to view, you can go back to the Actions menu and select “Available Pages” to grant or deny access to Reports, the Vault, or the Client Dashboard for the selected clients. “Available Reports” will also allow you to select the reports you want this Alliance Partner to see, assuming that you’ve granted them access to the Reports page.
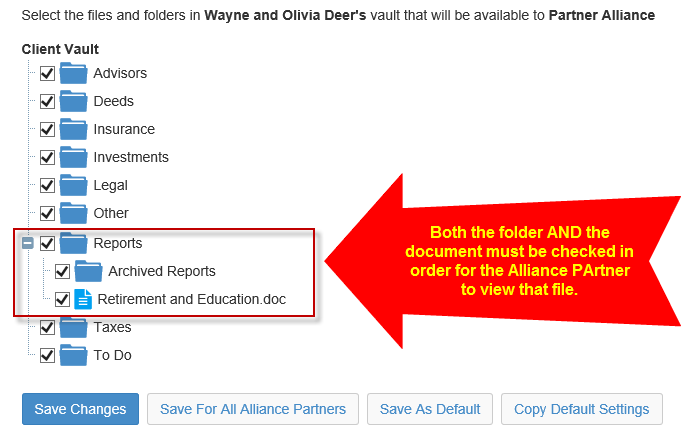
Lastly, from the Actions menu select “Client Vault Access.” Here, Advisors may grant very specific Vault access – down to the folder and the document itself. Check or uncheck folders you want the Alliance Partner to see. Then, check or uncheck the individual documents in each folder. For security purposes, both the folder AND the document must be checked in order for the Alliance Partner to view that document.
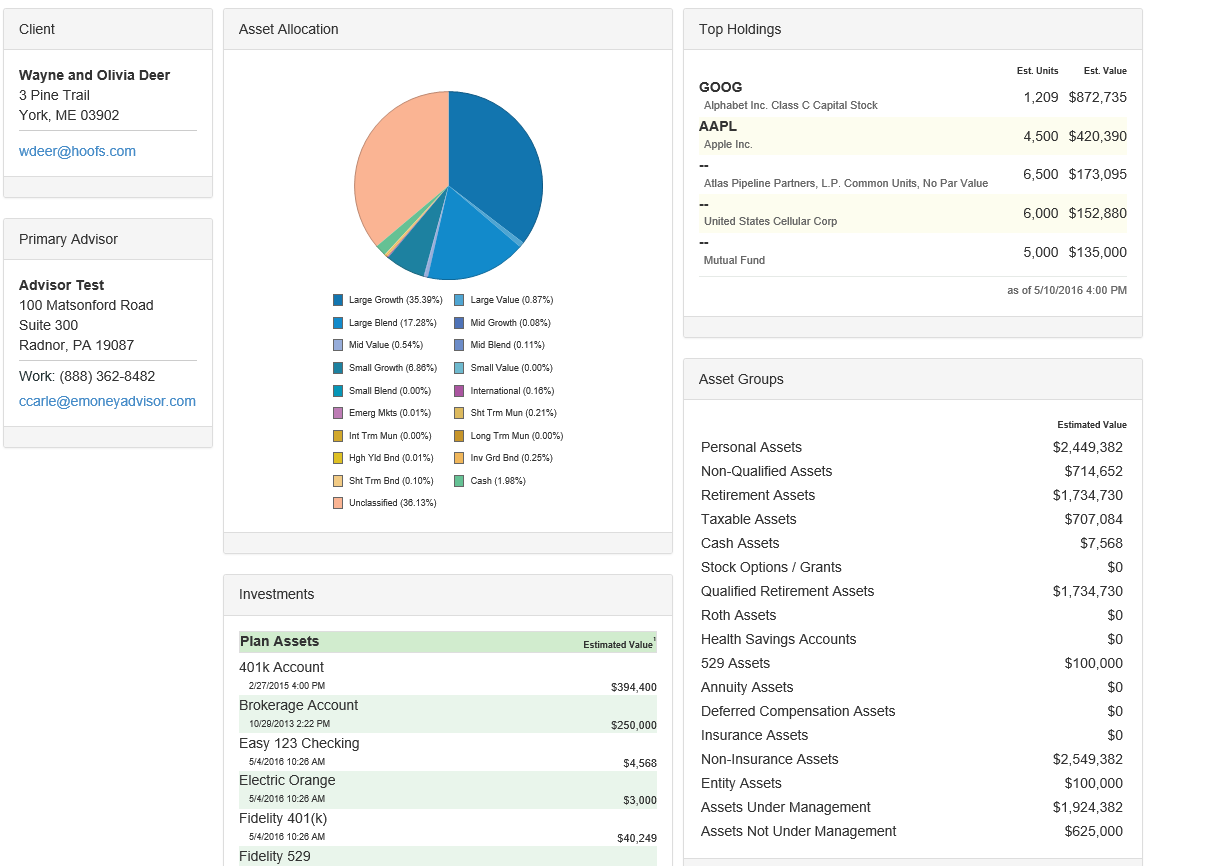
Once the Alliance Partner logs in, they will be brought to a Client List showing only the clients you selected them to have access to. By clicking into a client’s name, they will be prompted to view either the Client Dashboard, Reports, or Vault as determined by the access you granted them earlier.