

Learn more about the latest feature enhancements below.
Simplify the process of entering a Roth conversion into eMoney with the latest release, and make it easier to show the tax diversification benefits Roth accounts give to clients.
Now, instead of building complicated transfer flows between traditional and Roth accounts, you can model them directly in Roth Conversions, available under Savings & Transfers in Advanced Facts.
While existing transfers created to model a Roth conversion will continue to work, new Roth conversions will be much easier to perform. Additionally, the new Facts will support future releases with more Roth options that will not be available via transfers.
Note: If you use the new Roth Conversions facts to replace already-created Transfer Flows, remember to delete the existing transfers.
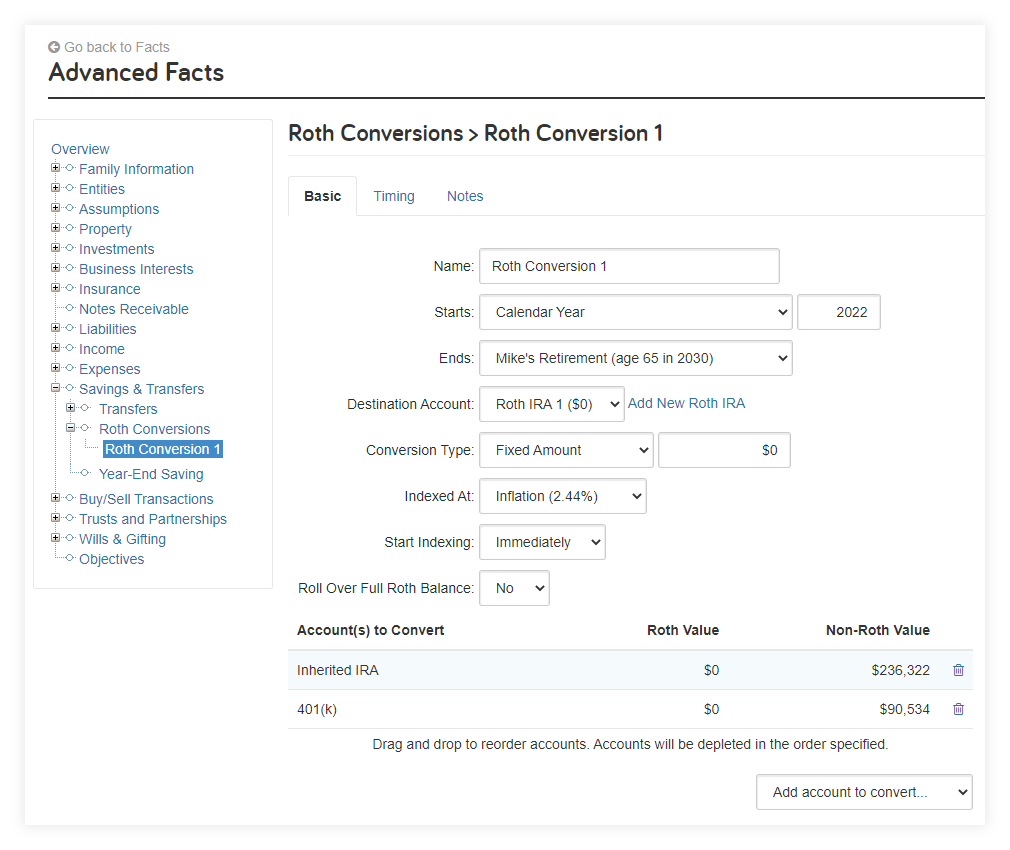
Roth conversions are located under the Savings & Transfers menu. Here you can add new conversions or delete previous conversions.
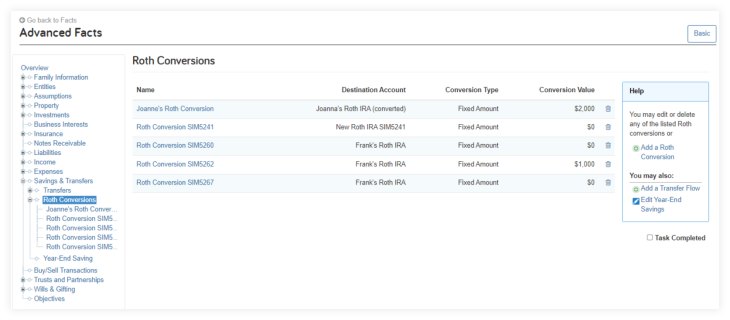
The Basic button is where you will enter the data to create the Roth conversion. First, name the conversion, enter a start date and an end date, and then follow the next steps:
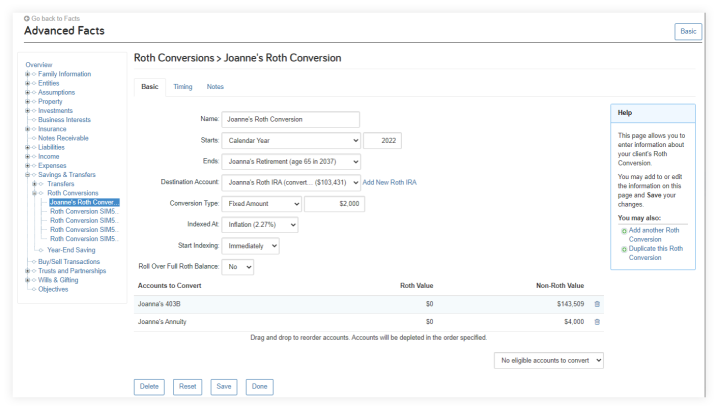
The Destination Account field will list the available Roth IRA accounts. If needed, you can create a Roth IRA by using the ‘Add New Roth IRA’ link beside the Destination Account field.
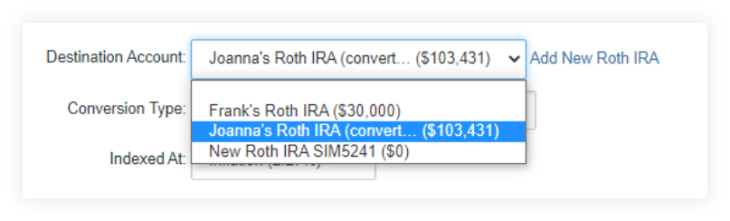
The Conversion Type field has four options:
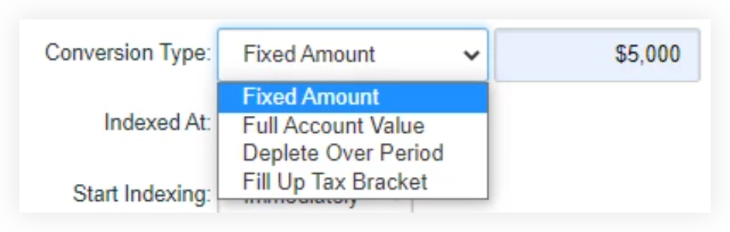
Note: Clients that have Flat Tax enabled will not be able to select the Fill Up Tax Bracket as a conversion type. This includes Traditional and Foundational Planning users. To allow the Fill Up Tax Bracket selection, use the 1040 tax option instead.
If you see two tax rates in the tax bracket drop-down menu, your Tax Assumptions are set to assume that the Tax Cuts and Jobs Act sunset occurs.
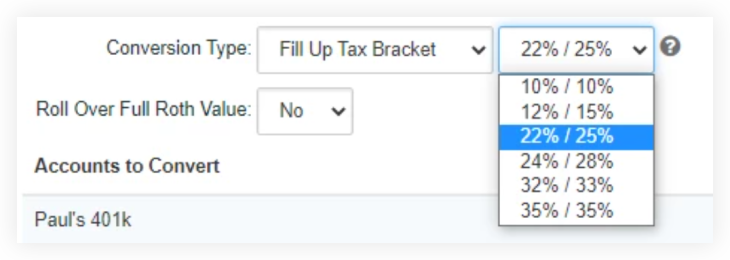
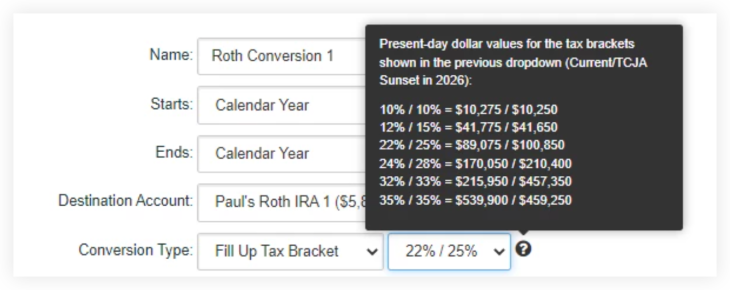
For a more detailed breakdown of the tax brackets, hover over the information icon for the specific dollar amount values.
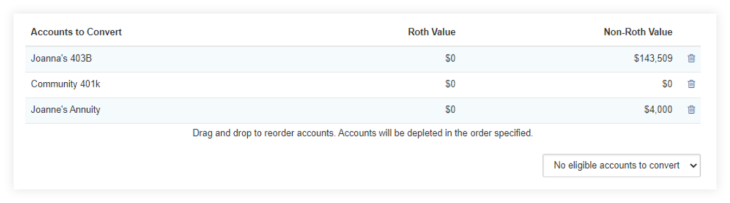
The Accounts to Convert section of the Roth Conversion form allows you to add available qualified retirement accounts and qualified annuities as source accounts. The Accounts to Convert must be associated with the same owner of the selected Destination Account.
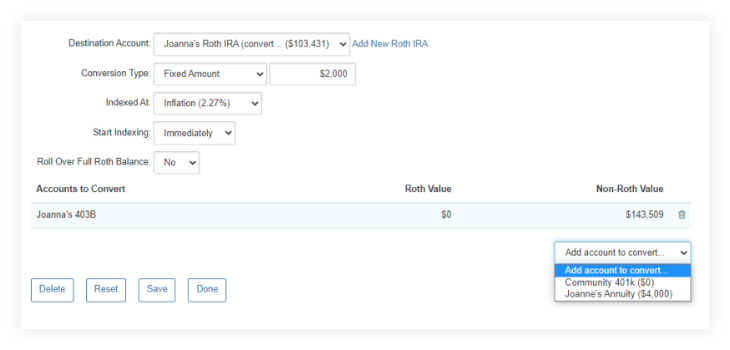
When all the desired accounts to convert have been selected, they will be listed in the Accounts to Convert section of the form displaying the Roth and non-Roth values for each. You can drag and drop these accounts to change the order. The top account will be the primary source of funds to be converted first across all the accounts provided.
Accounts that have been selected can also be removed from the list by using the trash can icon for each account. If no more accounts are available to be converted, the Add accounts to convert menu will state No eligible accounts to convert.
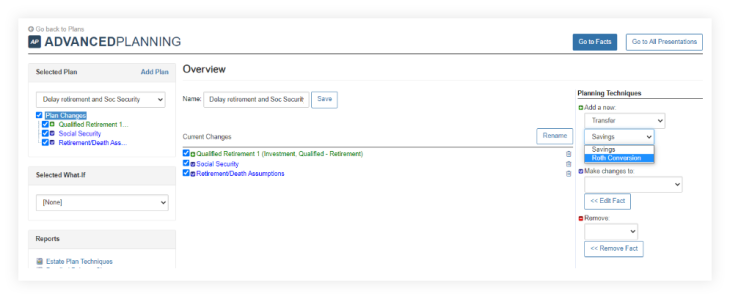
To add a new Roth conversion, select Roth Conversion in the Add a new: menu under Transfers > Roth Conversion. Adding a new Roth Conversion to a plan is the same form as used in Fact Finder.
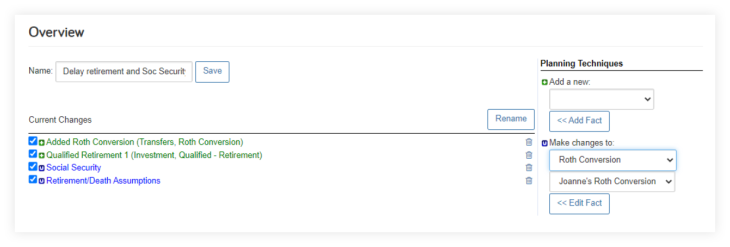
To modify or update a Roth conversion in a plan, select Roth Conversion under the Make changes to field. Select the desired Roth conversion from the list provided. Click the << Edit Fact button.
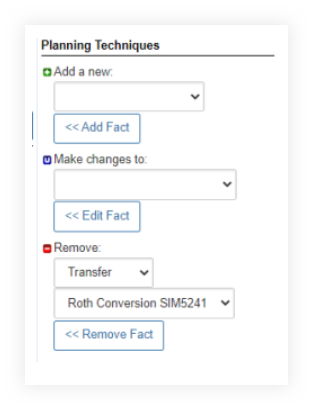
To delete a Roth conversion from a plan, select Transfer under the Remove heading. Select the Roth conversion to delete from the list provided. Click the << Remove Fact button and then Done on the read-only form page displayed.
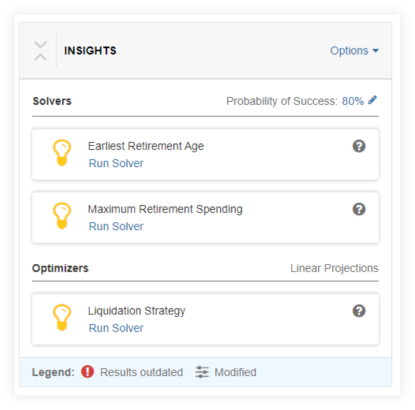
We released a highly requested enhancement to the Insights section within Decision Center. With Monte Carlo calculations now available for solvers, you can easily set your client’s desired probability of success and see how to achieve the results the client, or advisor, are seeking—without having to guess, or make multiple adjustments.
The next time you visit Decision Center, you’ll be prompted to set your target probability of success within the Options menu. Then you can run the solver for the desired probability of success, apply it to the client’s plan, and even Save to Base Facts to implement the recommendation on their plan.

Note: While Monte Carlo will be the default option, you can switch back to straight-line calculations at any time using the Options menu. Users can save a default probability of success so you do not need to enter it every time within Decision Center.
Finally, you’ll also notice that the existing options have been split into Solvers and a new Optimizers category. The Liquidation Strategy solver is designed to maximize the amount of wealth left at the end of a plan, rather than provide large scale solutions for plans not currently on target. For this reason, this solver is unavailable for Monte Carlo since the results provided by the solver are unlikely large enough changes to produce significant shifts in Probability of Success.
The Decision Center has tax planning tools! With the new Total Taxes report, you can show your clients the long-term impact of your recommendations on their total cumulative taxes in a way that is engaging, interactive, and a natural part of their planning conversation.
With Total Taxes, you can visually demonstrate to your clients how tax, charitable gifting, and portfolio strategies impact not only their plan’s Probability of Success and Ending Total Portfolio Assets but the Total Cumulative Taxes over the lifetime of the plan.
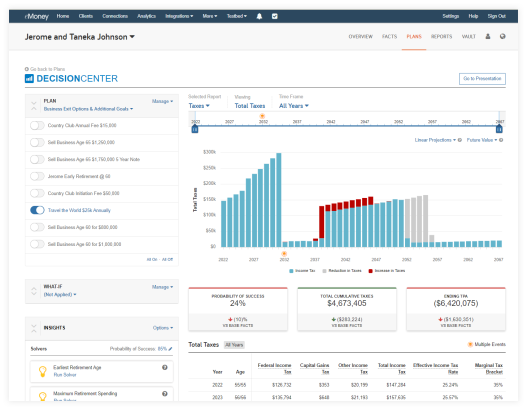
The new Decision Center report category Taxes and Total Taxes report builds upon the future vision for a streamlined, intuitive, and comprehensive work environment within the Decision Center.
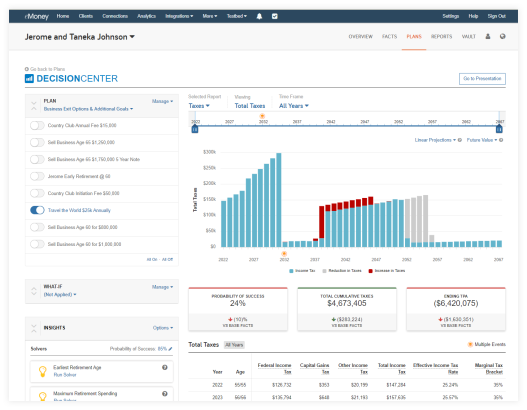
The Total Taxes chart will show you and your client the impact of tax-efficient strategies in real time by providing visibility into how different plan changes can impact their long-term cumulative taxes. Show your client how significant life events, such as selling a business or a vacation home, will affect their lifetime taxes.
While in Decision Center, you can also select Go To Presentation to view the Total Taxes Report.
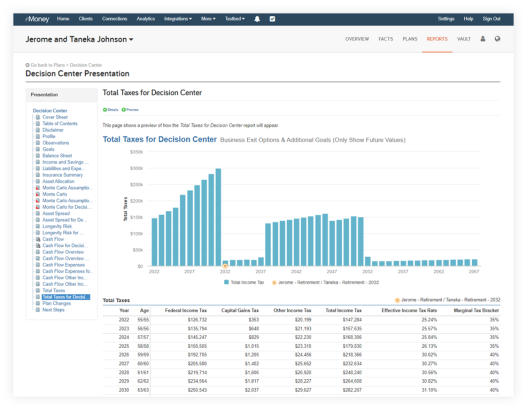
You will now notice a new Selected Report category for taxes in Decision Center. The Taxes category will launch with the Total Taxes report. To access the new Total Taxes report in Decision Center, select Taxes under the Selected Report drop-down menu.
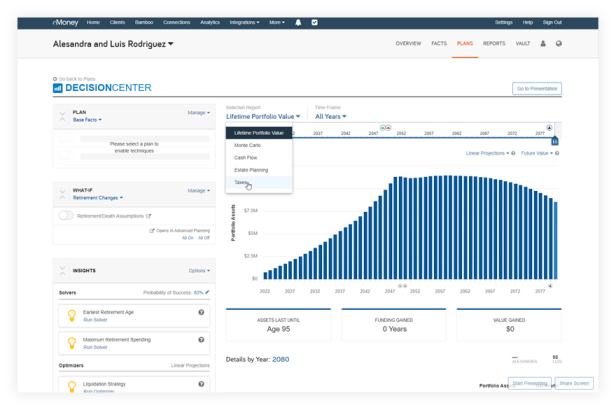
To access a step-by-step how to on this new update, go to the Help menu, type in Decision Center Total Taxes Report.
Along with the addition to Fill Up Tax Bracket, you can access a new chart to the Taxes report category in Decision Center that gives you and your clients an engaging way to visualize the impact of Roth conversion scenarios. With the Tax Brackets chart and Fill Up Tax Bracket option, you have a streamlined way to make Roth conversions a natural part of your planning conversations in Decision Center.
Where Can I Find the Tax Bracket Chart?
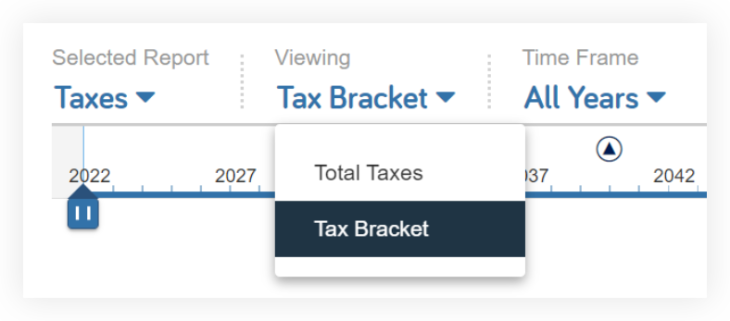
The Tax Bracket view can be accessed within Decision Center by selecting Taxes in the Selected Report menu and then selecting Tax Bracket from the Viewing drop-down.
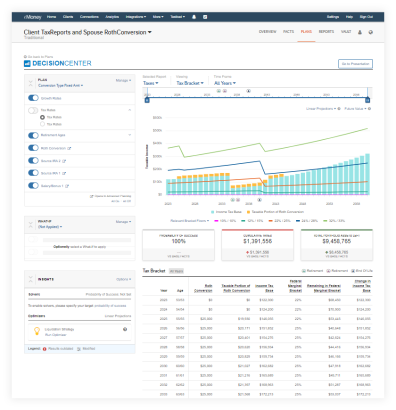
As with many other views in Decision Center, the Tax Bracket page contains a chart, metric cards, and a detailed table. This page is a comparison view similar to the Lifetime Portfolio Value view, where the currently enabled techniques in Decision Center (including the Plan, What-If, and Solvers) are compared to Base Facts.
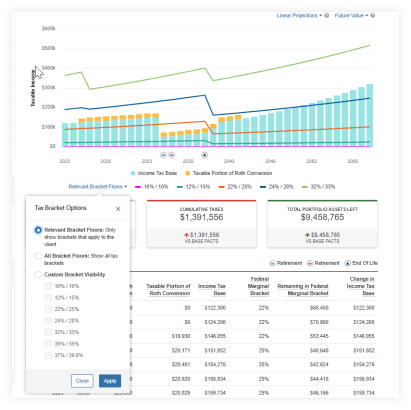
Tax bracket floors are overlaid on the chart to provide a visual indicator of how the taxes associated with Roth conversion(s) relate to applicable tax brackets. The default is to show the relevant bracket floors. You have the option to show all brackets or select a subset of brackets.
.
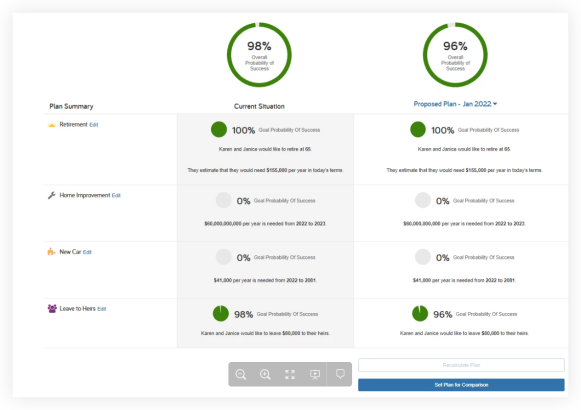
Foundational Planning users have a new way to initiate legacy planning conversations with clients. The new Leave to Heirs goal is integrated into the planning experience and shows clients how likely they are to achieve their legacy goals.
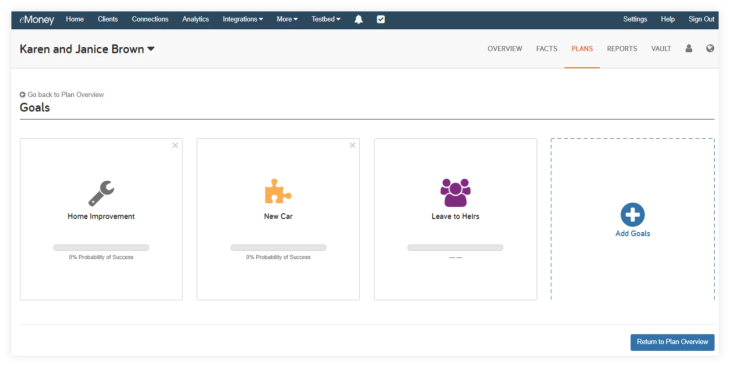
Available under Additional Goals, Leave to Heirs is a default goal that cannot be removed. However, it will not appear in any reports or presentations until data is entered.
To provide greater transparency into the amount needed at the end of the analysis, it provides immediate feedback when you apply an Indexed at rate to the Leave to Heirs Amount.
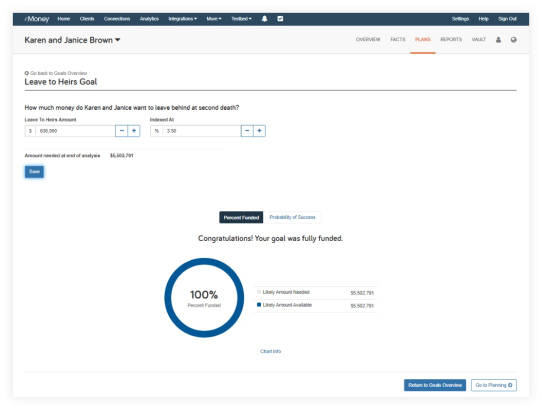
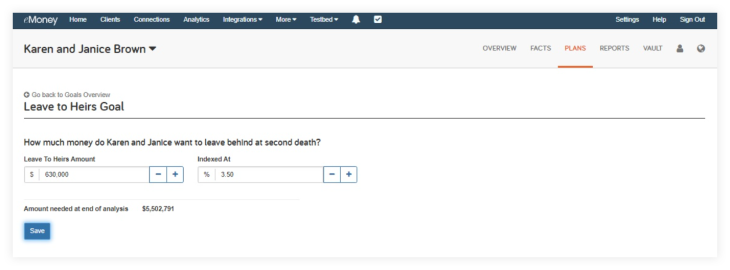
Once the goal is selected, you can enter a dollar amount that the client wishes to leave to their heirs. You can also select an index rate from the drop-down menu and have the amount increase over time at the rate you and the client choose. The Amount needed at the end of analysis will be the combination of the Leave to Heirs Amount and Indexed at rate.
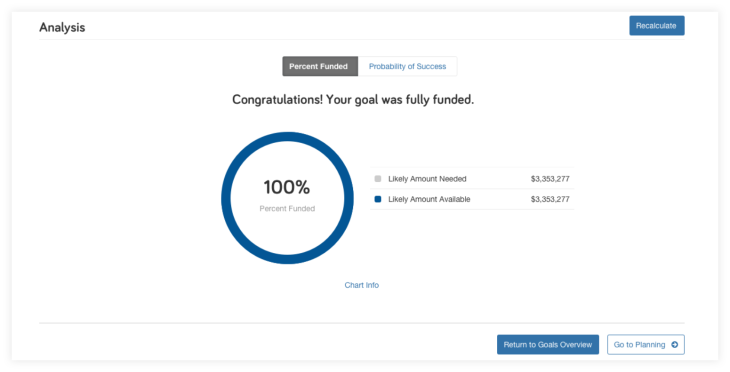
The Analysis chart will show the percentage of the goal being funded, as well as the probability of success. How the goal is funded will come from the information entered within the facts.
To better represent the action taking place within Foundational Planning when selecting a plan to use for comparison to the base facts and reports, the button text has been renamed from Set Plan to Active to Set Plan for Comparison.
This update makes no changes to functionality and is intended only to provide consistency between the Foundational Planning tool and reports.
This update simplifies the process of updating the asset class and sector details of securities on the All Holdings page. Now you can easily select multiple holdings on a single page and apply changes in bulk—saving time and increasing productivity.
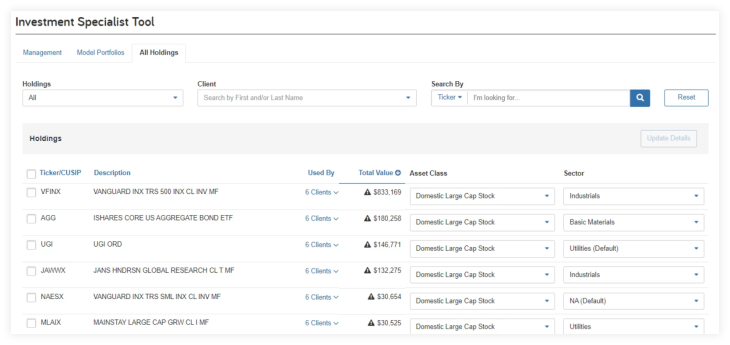
How Does It Work?
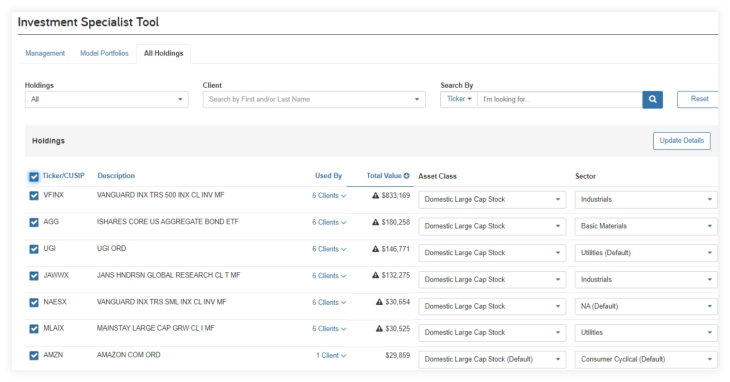
You will now notice each ticker/security listed has a check box before it, as well as a Select All check box at the very top next to the blue Ticker/CUSIP in the header. You can select the tickers you wish to edit or select all, and then click on Update Details in the top right, and begin making your desired changes.
When the Update Details button is selected, a modal appears with the Asset Class and Sector fields.
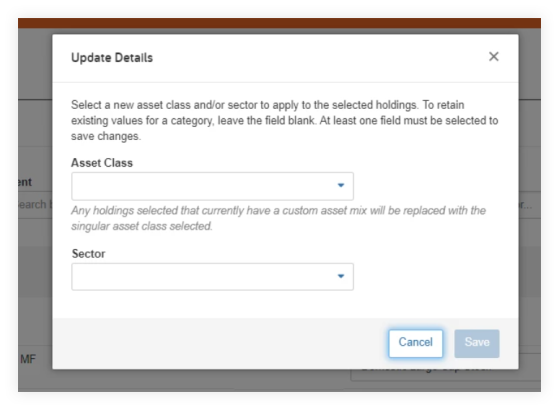
You can now assign a new Asset Class and/or Sector to all the securities selected. The Save button becomes available once a change has been made.
As part of our commitment to modernizing existing reports and presentations, enjoy a new consistent aesthetic across online and printed versions across your new set of updated Reports.
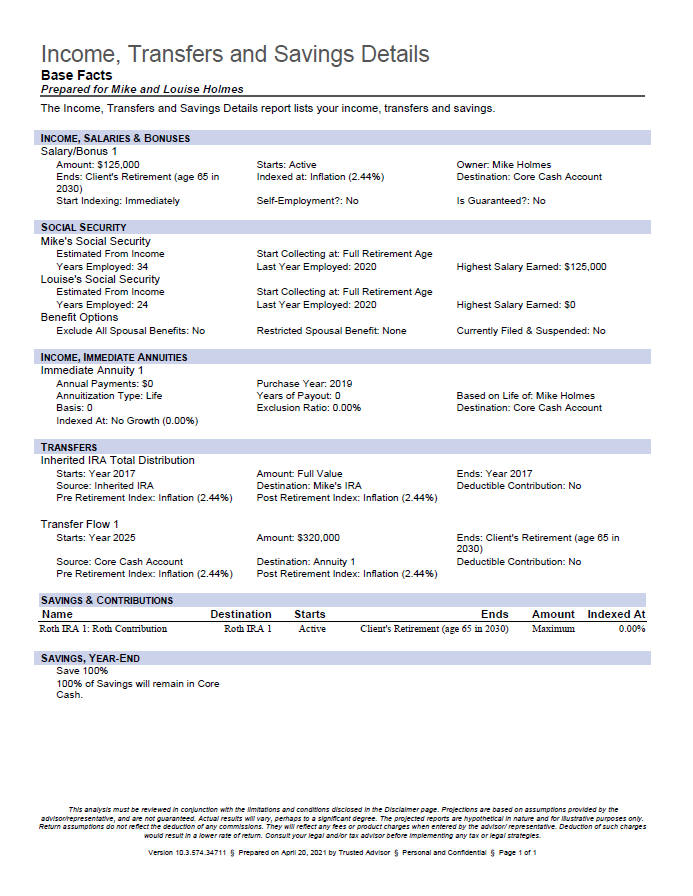
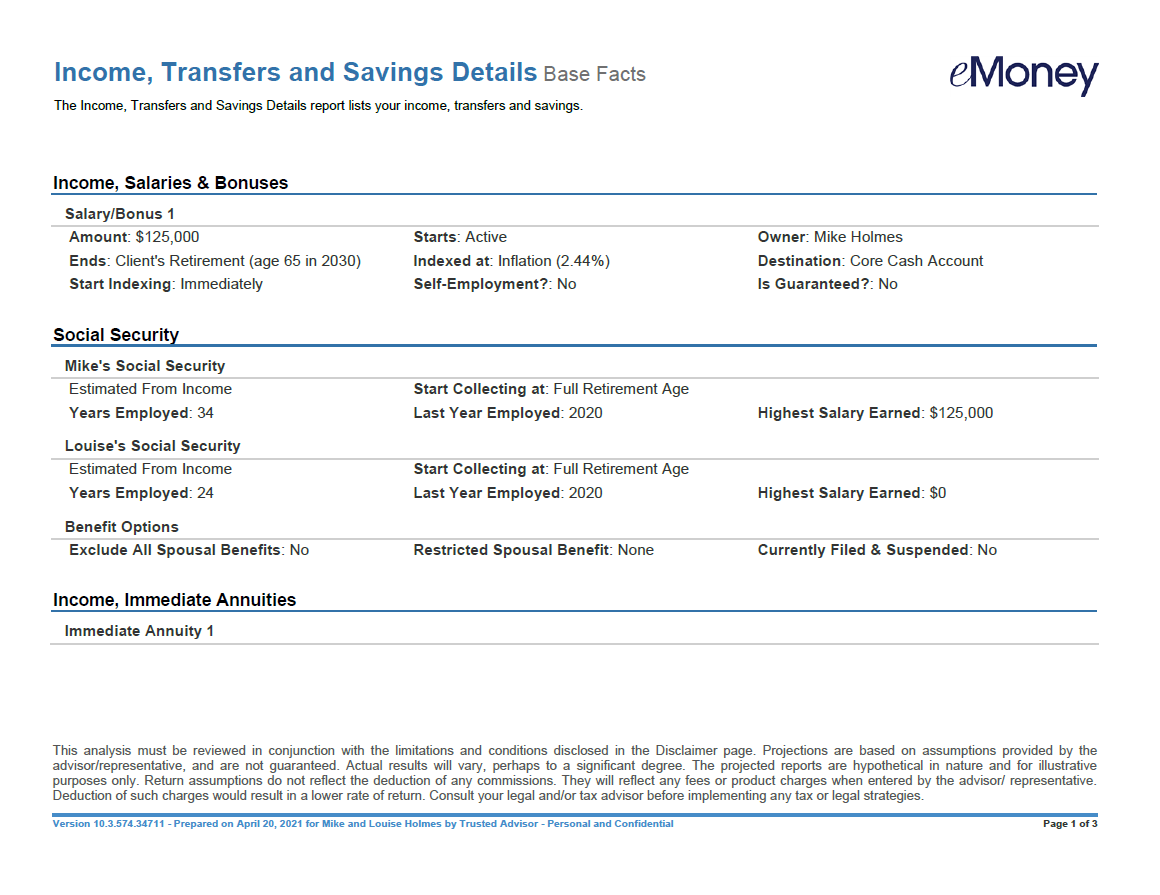
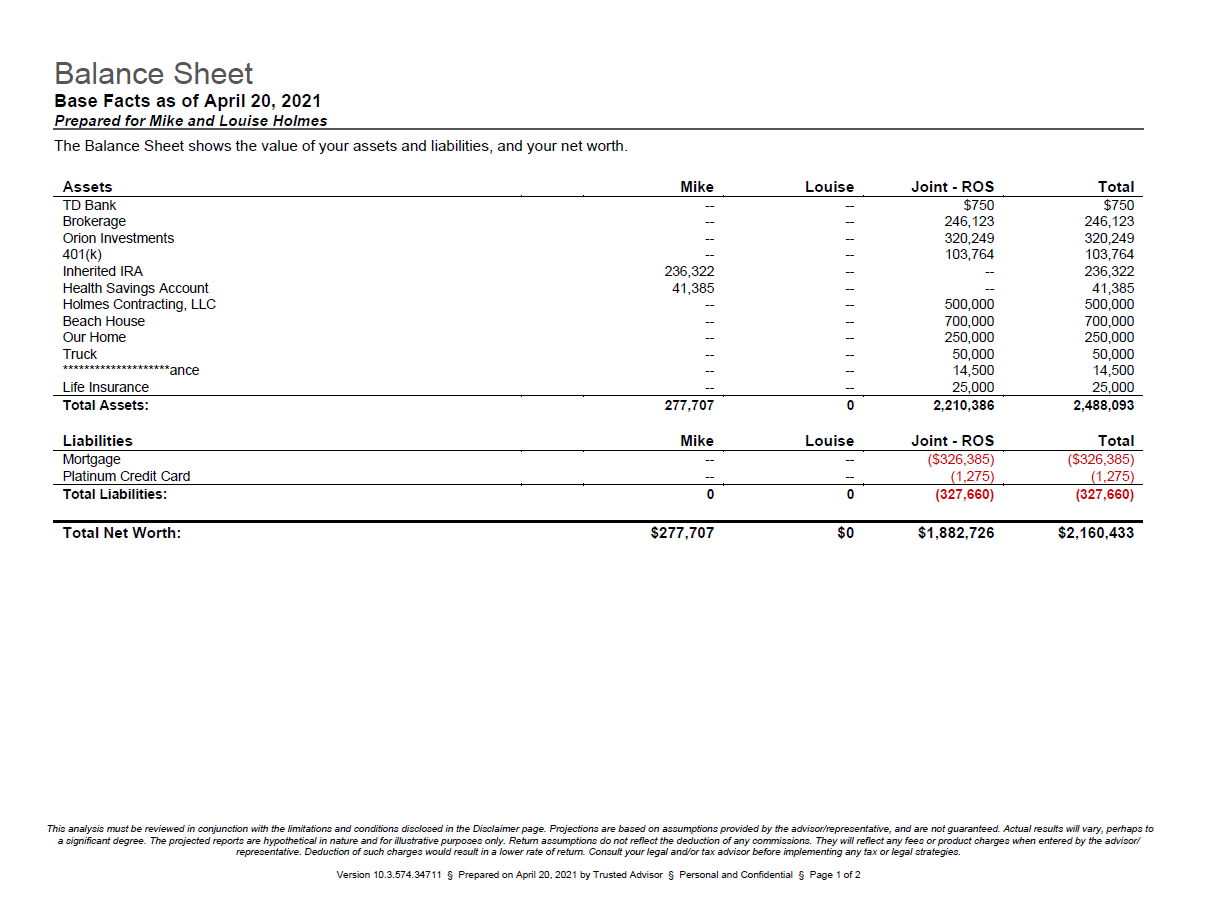
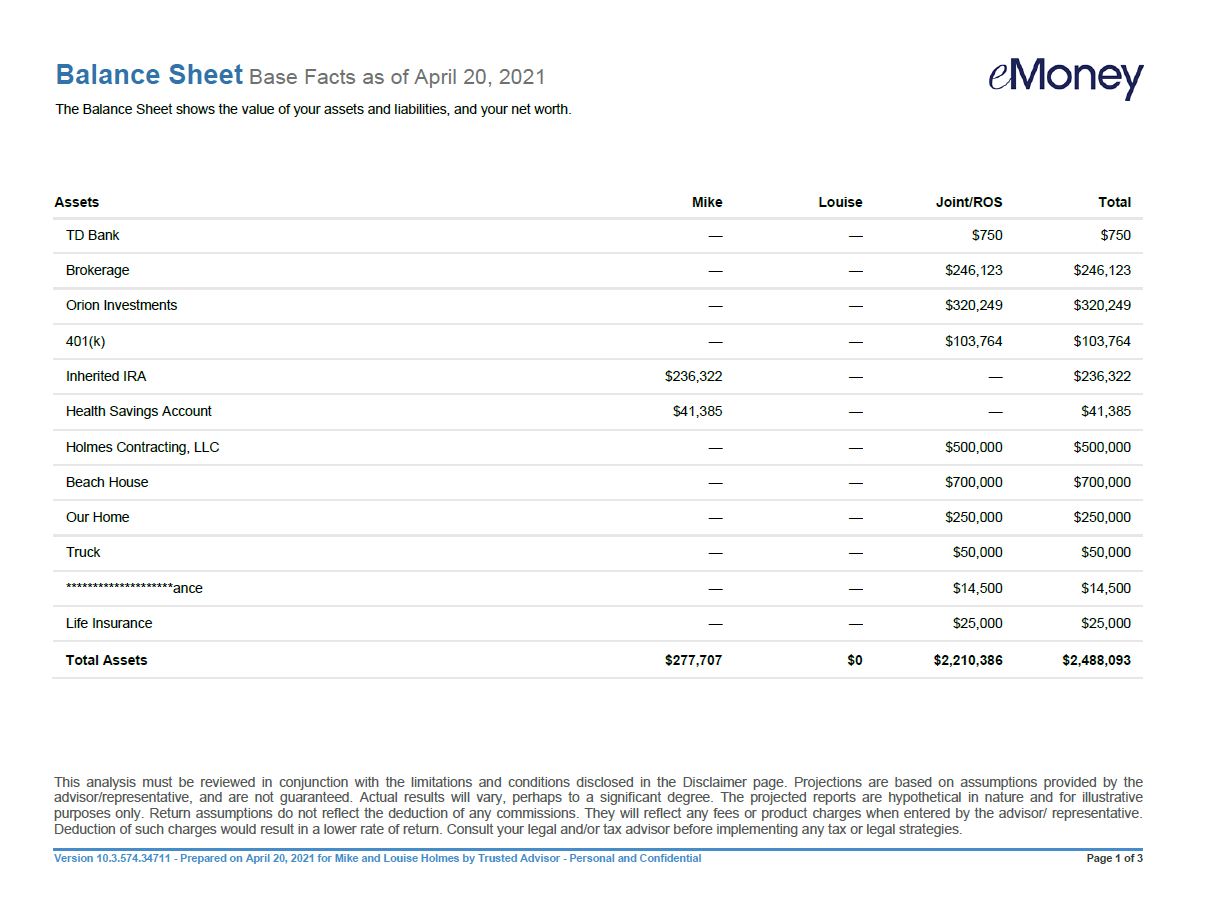
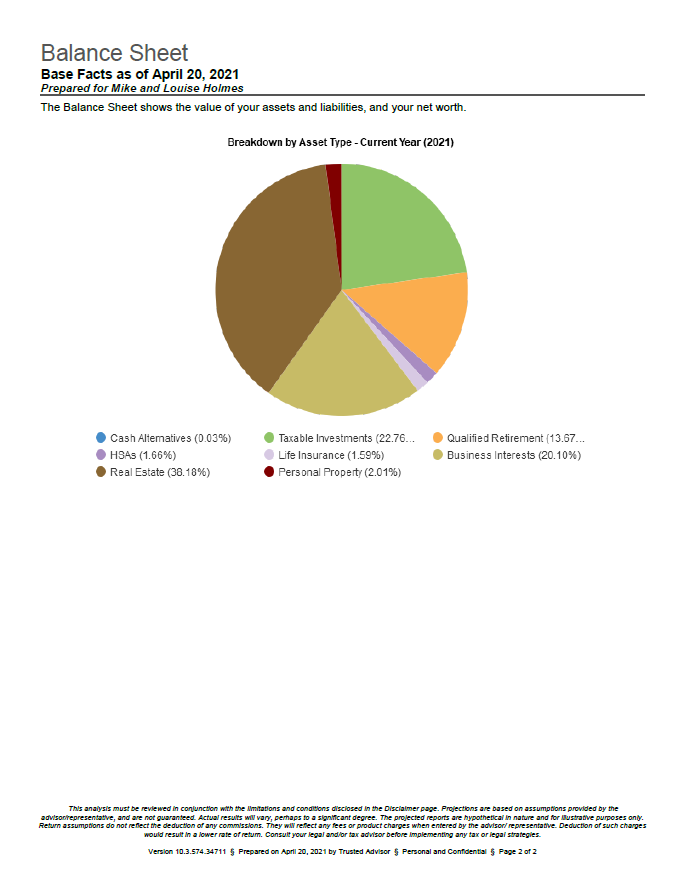
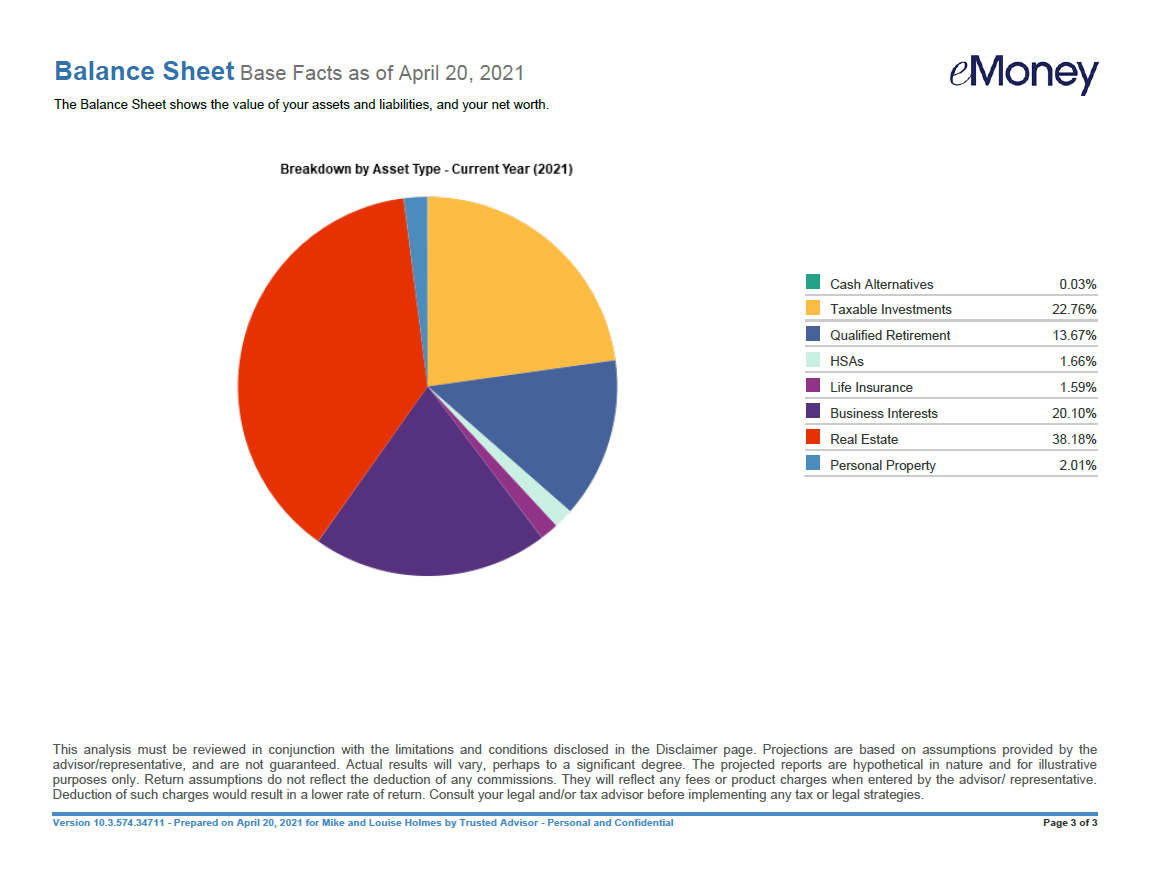
Note: Presentations currently saved to the Vault will not be updated with the new look and feel.
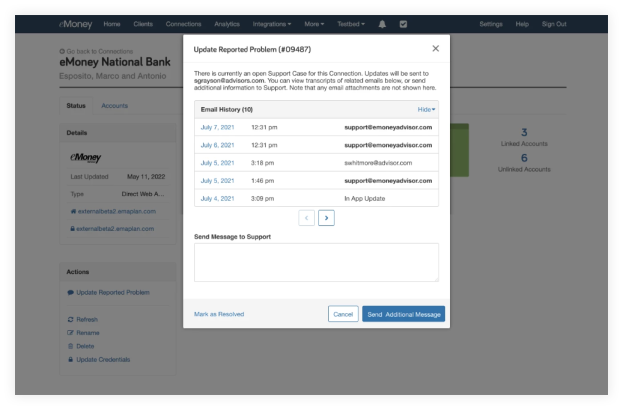
The new Conversation History feature within the Report a Problem workflow provides better insight and visibility. All of your team members involved in helping clients resolve issues can now see a full conversation history, including the date and time of all outgoing and incoming messages related to a connections-related issue.
This is especially useful for instances when you and your support staff are involved in the resolution of a connection issue.
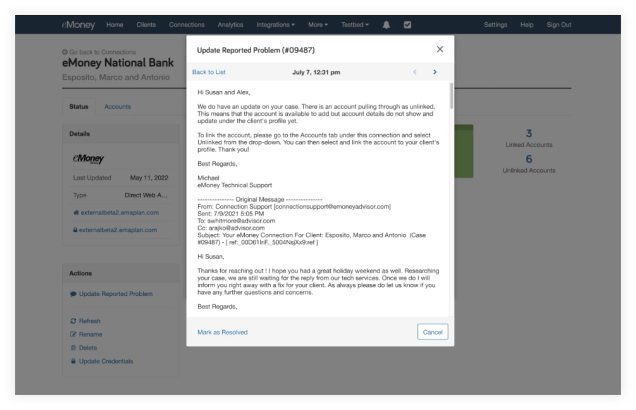
When a connection is selected, to the left you will see the Actions box. Click on Update Reported Problem to send a message to the support team. Above that, you can see your Email History where you can click Show to view all previous communications.
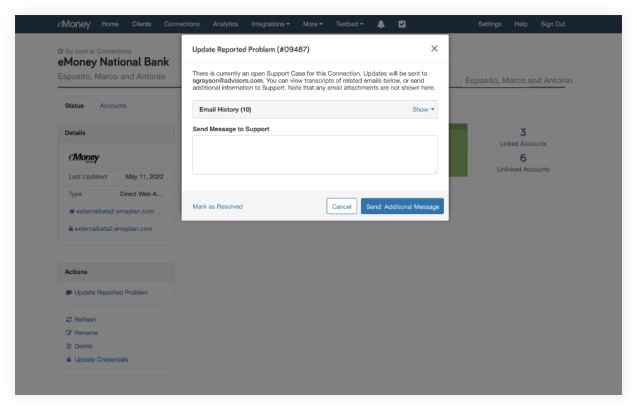
The emails are presented in chronological order, with five per page and the most recent email at top of the list.
When you select a specific email, the text includes the full history of the email.
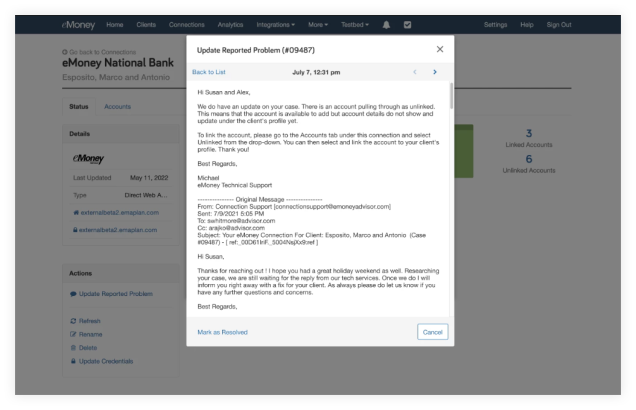
If the issue is resolved, you can click Mark as Resolved, to close out the case or click Cancel to go back to the connection.
Your clients can now create a clean list of their most desired accounts on their client site, and hide connected accounts they do not wish to see. This update allows your clients to control which accounts are listed under the Organizer tab on the client site so they can interact more with their connected accounts.

How Can My Clients Start Hiding Accounts?
From the client site, they can select the Organizer and click on Accounts. The client will need to click the All tab to view all accounts they have established on their site, and from that list, they can select which ones they want to be displayed and which they want to hide.
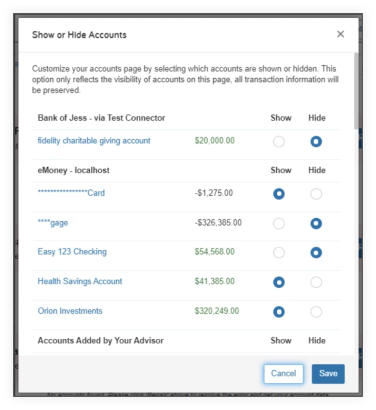
Only clients can hide their accounts. Impersonating advisors will not see the Hide Accounts button.
Please note, that if a client hides accounts on their account organizer page, you will still be able to view those accounts on your Advisor portal.
Any other important information I should know if my client starts hiding accounts?
To enhance the training experience for eMoney users, the Training page link is moving from the Help menu drop-down to the main navigation bar.
In addition, the eMoney Core Concepts training series, a part of our Getting Started program covering the basics of the platform for new users or those looking for a refresher, is being updated. What was previously a series of six, one-hour live webinars has been converted to a new micro-learning format to help you optimize your learning experience on your time.