for expert insights on the most pressing topics financial professionals are facing today.
Learn MoreAre you in the process of completing mid-year client reviews?
Simplify the process with eMoney’s Save as a Template feature. By putting together a template for your mid-year reviews, you streamline the process by creating a customized, comprehensive presentation you can use for your entire client list.
Here’s how to get started:
There are a variety of opinions regarding the mid-year review. Some prefer to take a look at the past six months of portfolio performance; others prefer to look forward with strategies for the final stretch of the year. Regardless of what your strategy for the meeting is, it’s crucial to nail down in advance what information you’d like to share with your client. This will make it much easier to select which reports to include in your template.
Your next step should be choosing the reports you’d like to include in your template. Here are some of the top ten reports you could use:
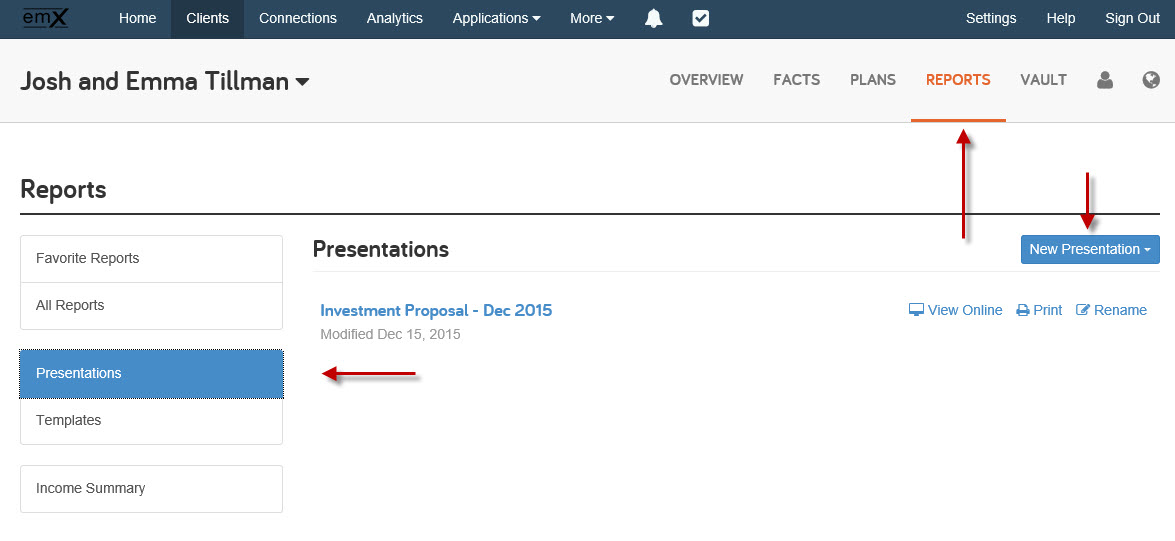
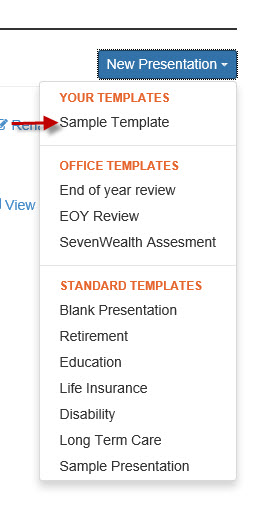
Once you’ve settled on the reports you’d like to include in the template, it’s time to put it all together. Let’s head over to the Reports section, and then select Presentations on the left-hand side. After you’re there, click the New Presentation button.
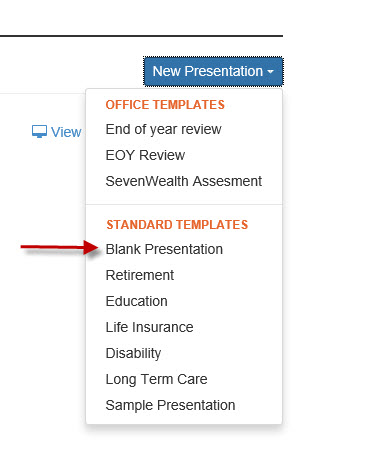
Then, select the Blank Presentation option under Standard Templates.
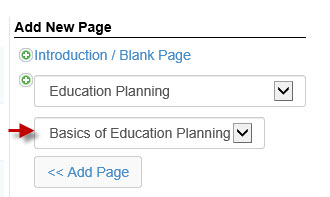
Give your template a name, and we’re ready to add reports! On the right-hand side, you’ll click the – select – drop-down menu to see the reports available to be added to your template. If you’re confused about where to find individual sub-reports, don’t worry—just select the main report and a sub-report drop-down menu will appear below! Here’s what that will look like:
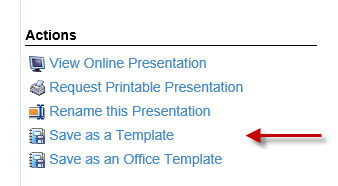
After you’ve added the reports you’d like to include in your template, click either the Save as a Template or Save as an Office Template option under the Actions menu at the bottom right part of the page. While both of these options will allow you to use this template for all your clients, the Save as an Office Template option allows for other advisors in your office to use the template as well.
That’s it! Your template is now available for use with any of your clients! Just click the New Presentation button in the Presentations area and you’ll find the template under the Your Templates sub-header. Don’t worry – the information that is shown is automatically customized for each individual client you use the template with. The only carryover between presentations will be the included reports.
Creating a template is a great way to save time for yourself and create consistent, in-depth presentations for all of your client mid-year review meetings.