for expert insights on the most pressing topics financial professionals are facing today.
Learn MoreHelp your clients achieve their financial goals! With the Goals feature in the Client Portal, you can create a collaborative goal planning process that helps your clients become more involved in their financial plan.
You can enable clients to easily add, personalize, and track goals—including the ability to fund them with specific accounts.
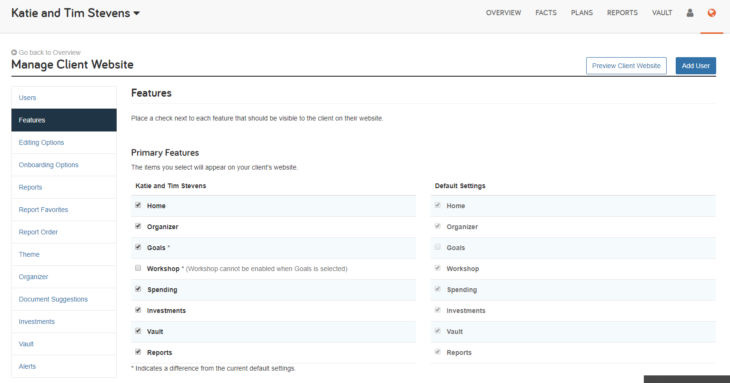
The first step is to make Goals visible on the Client Portal. To do this, go to the Manage Client Website page, select Features, and place a check mark next to Goals before saving.
Pro tip: To allow clients to add, edit, and fund goals, make sure under Editing Options on the Manage Client Website page, you select May View and Make Changes to Data.

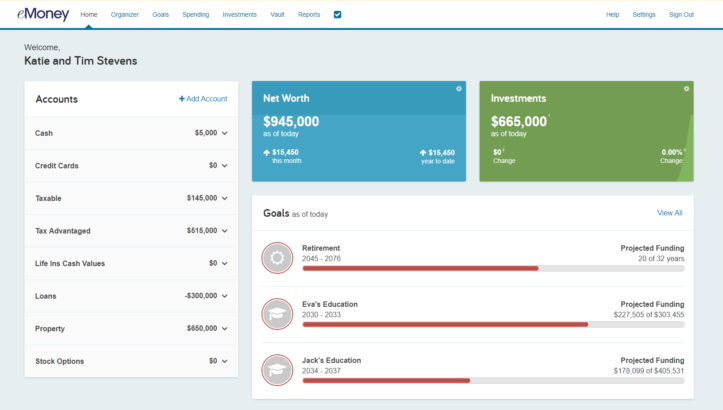
Now, when the client logs into their Client Portal, they can easily view and track their financial goals directly from their homepage.

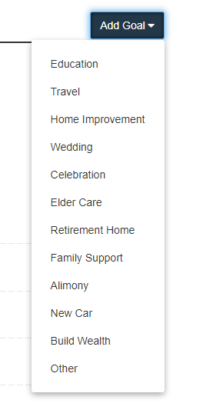
To add a new goal, they will need to click on either the Goals tab on the top toolbar or View All in the Goals section of the homepage and select Add Goal. They can choose from a list of goals such as Travel, Education, Wedding, and more. Once selected, they’ll fill in more information such as dates and costs.
It’s important to note that goals added in the Client Portal will reflect in their financial plan on your advisor site.

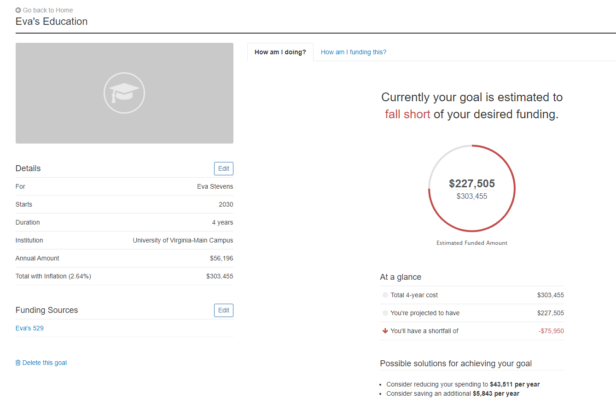
From the Goals page, clients can select a specific goal to edit details and select funding sources.
When funding a goal, clients will click Edit next to Funding Sources. They can then select one or more accounts from the list of available sources and click Save. To view more details on dedicated funding and shortfalls, they can check out the How am I funding this? tab.
Finally, on this page clients will see insights into projected cost and possible solutions for achieving their goals.

Are your clients ready to get started with Goals? Share our client-facing Goals user guide for step-by-step instructions.