for expert insights on the most pressing topics financial professionals are facing today.
Learn MoreThe Client Portal helps your clients organize and monitor their data, and collaborate on their financial plans. The mobile site gives them the ability to access and engage in the Client Portal from the convenience of their phone!
Let’s look at how to assist clients in the setup process and which user guides to share so they can start enjoying the mobile experience.
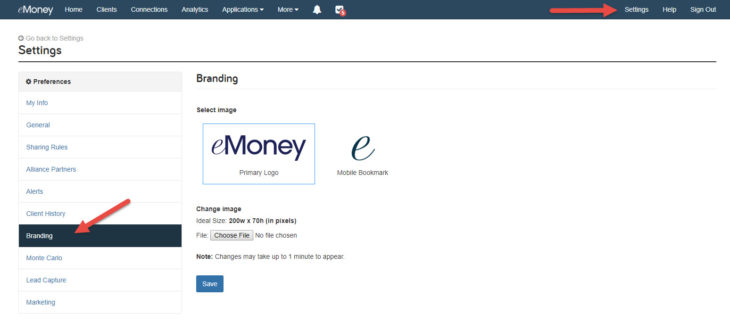
Before inviting your clients to register for the Client Portal, take a minute to look at your advisor settings. Here, you’ll be able to brand the Client Portal and the mobile site.
Select Branding to upload your firm logo. The primary logo will appear on the login page and the homepage of the Client Portal. The mobile bookmark will appear when a bookmark is added to the home screen of a client’s smartphone or tablet.
To assign the logo, click on the logo box and select Choose a file to browse for images on your computer. Once your logo has been successfully added, click Save. The ideal size is 200w x 70h (in pixels). For more information, check out our branding user guide.

Now you’re ready to walk your clients through how to add and access their mobile site.


Finally, it’s time for clients to explore. With mobile access to the Client Portal, clients can see their complete financial picture on the go. They’ll have access to their favorite desktop features such as Accounts, Goals, and Vault documents from wherever they are and at any time.
The mobile site offers a consolidated view of the Client Portal to fit on their phone screen. Clients will have the ability to:
When introducing the mobile site to your clients, be sure to share this Mobile Guide for a complete breakdown of all available features and how to use them!