for expert insights on the most pressing topics financial professionals are facing today.
Learn MoreHave you ever prepared for a client meeting and noticed their Cash Flow report shows a negative net cash flow at the end of the year?
While the discussion of asset liquidation may not be a fun one to have, It’s important to know how to answer your client’s questions about what happens when their expenses are greater than their income and how you’re determining which portfolio assets are being used to cover the deficit.
So let’s learn more about eMoney’s default asset liquidation order and how you can customize the strategy based on what works best for your clients and their assets.
First, let’s look at the default liquidation order. At the end of the year, if your Core Cash Account has a negative balance, funds are automatically drawn from any available liquid assets to cover expenses. Unless otherwise specified, funds are generally withdrawn in the following order:
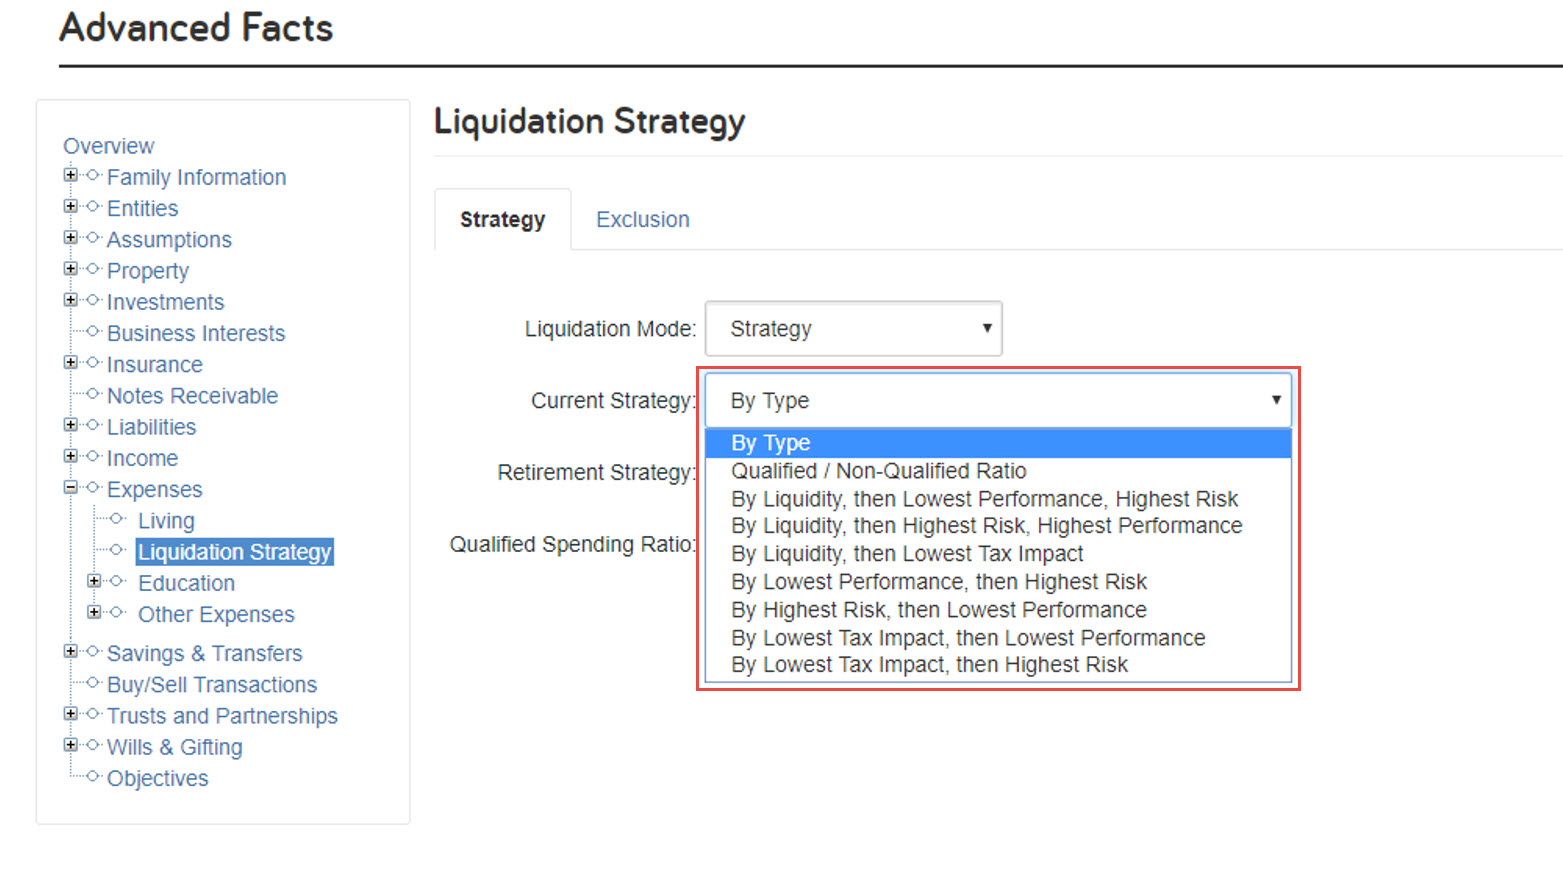
While the default order may work well for some of your clients, others may require a more customized approach. This is when you can use the Liquidation Strategy features to define and customize the order of asset liquidation, creating the optimal withdrawal strategy for your clients.
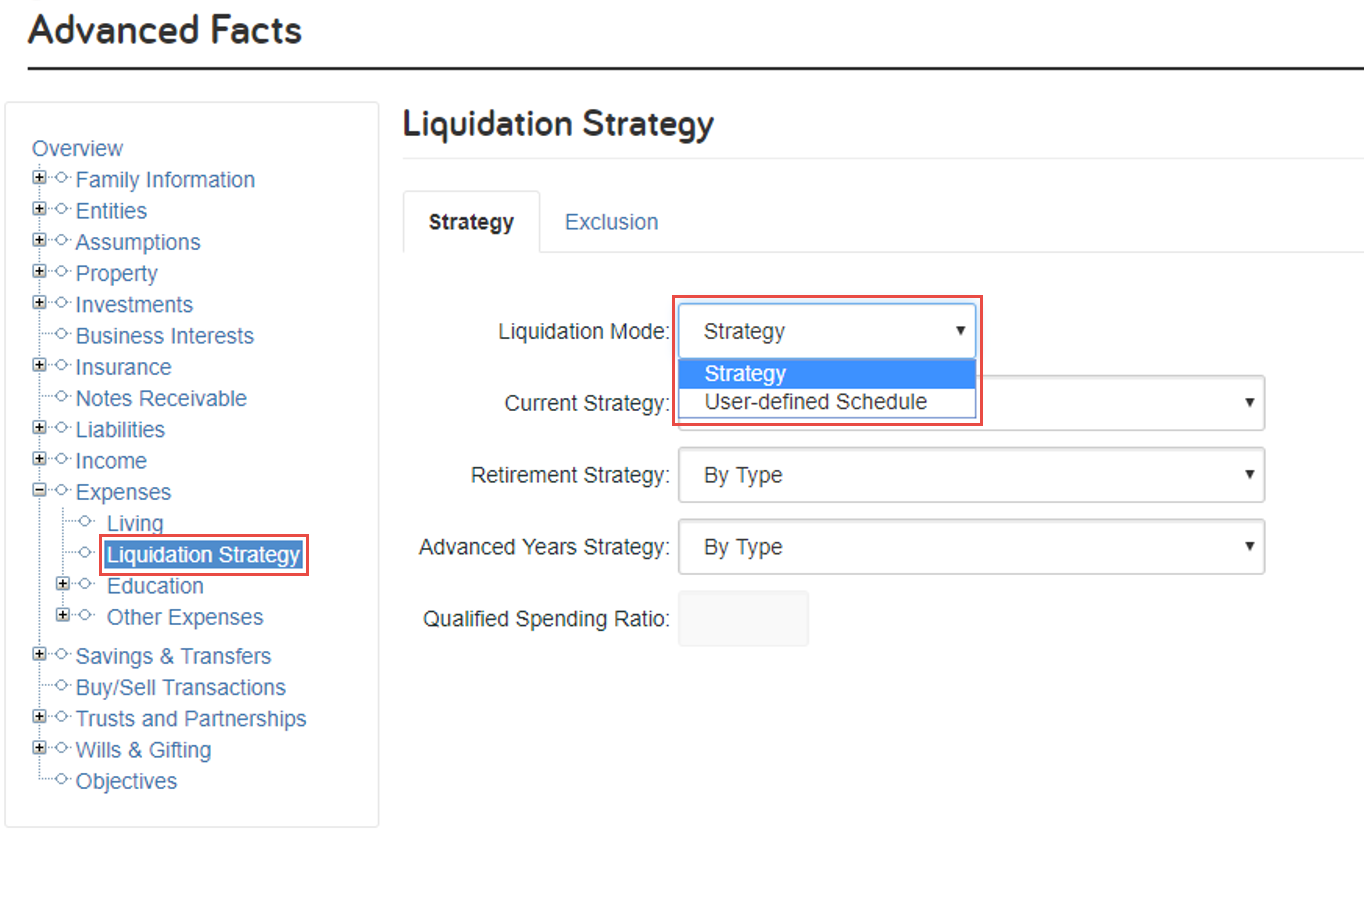
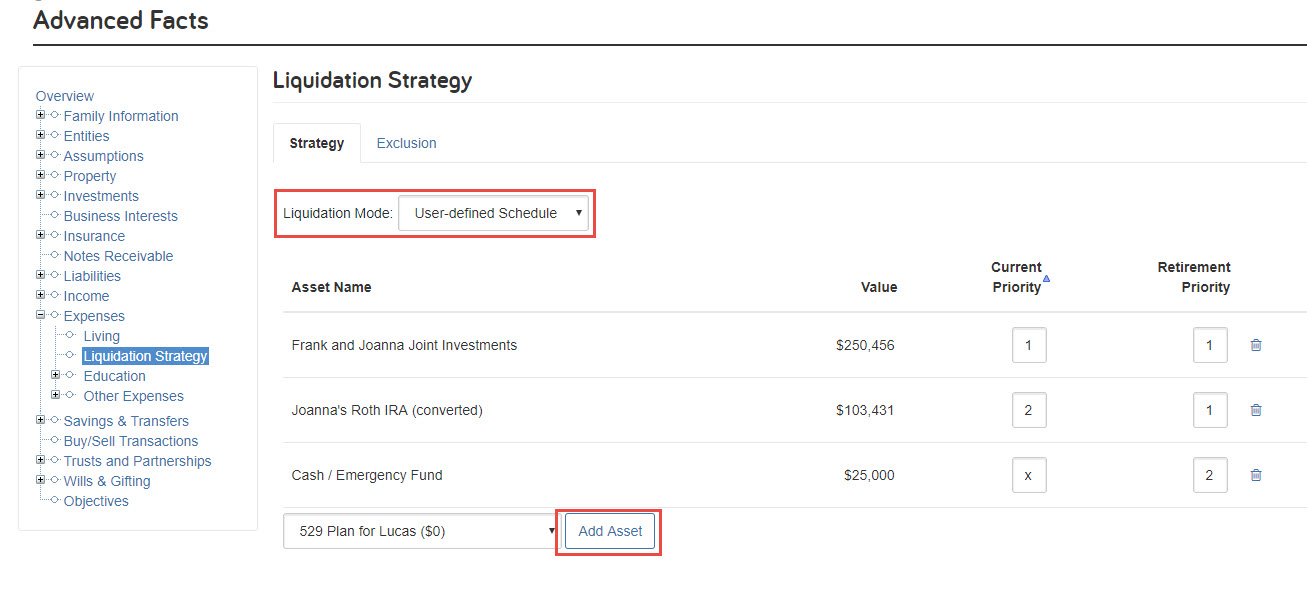
To customize a client’s liquidation strategy, you will navigate to:
Advanced Facts under Expenses > Liquidation Strategy
There are two Liquidation Modes you can choose from Strategy and User Defined Schedule
Pro tip: To exclude an asset only during a specific time period use an X for the Priority and the asset will not liquidate during that time.
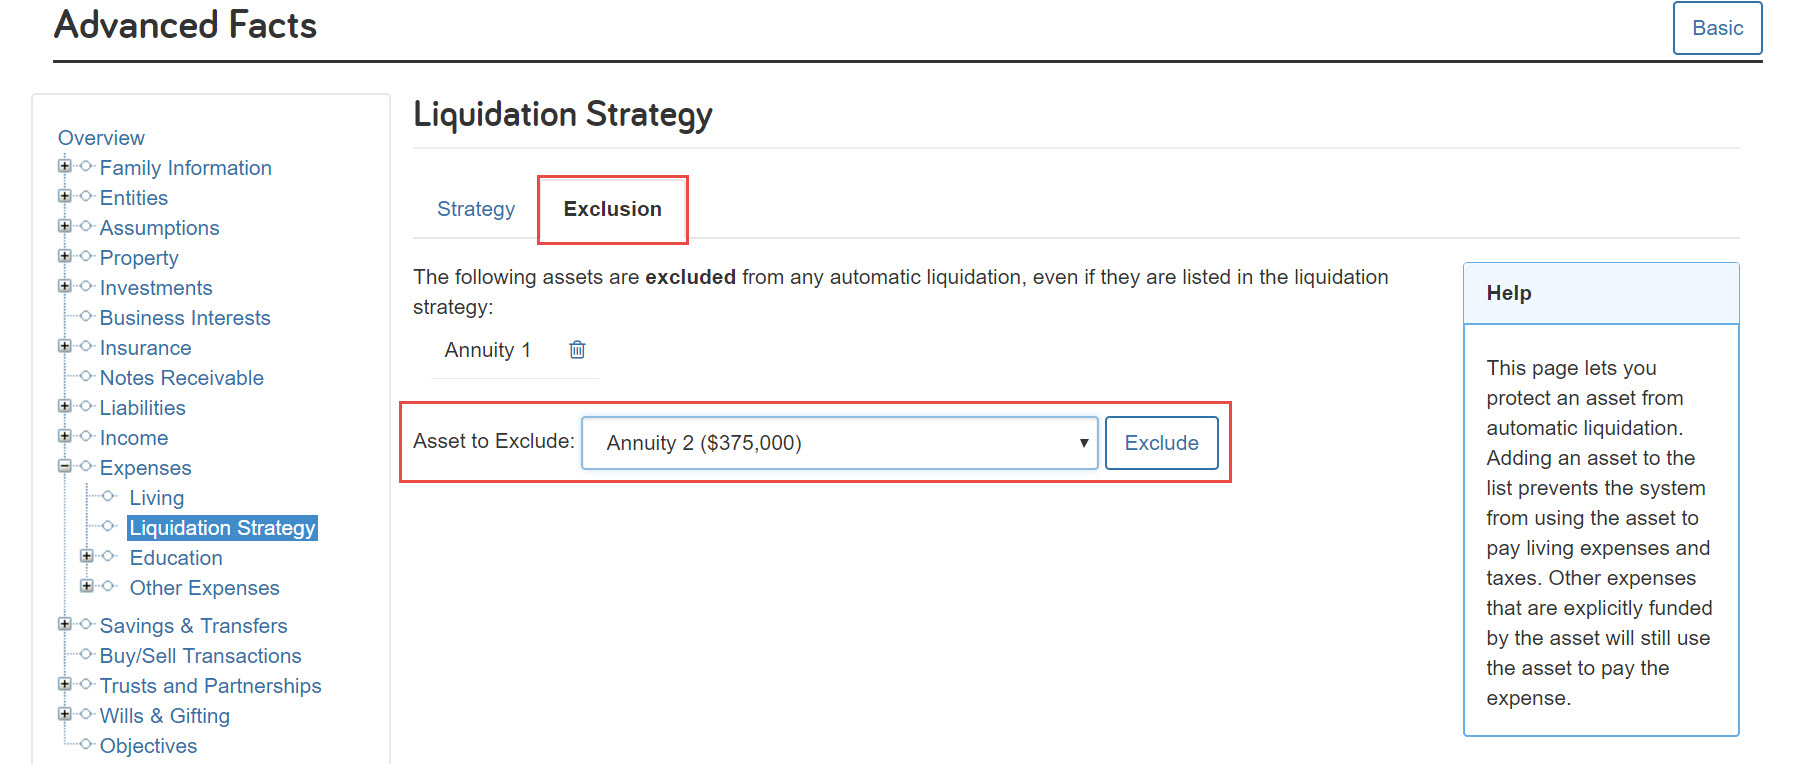
To protect an asset from liquidation, you will want to use the Exclusion tab. A common example is if your client has a guaranteed annuity. Excluding this asset from liquidation, will prevent the software from using it to pay off expenses.
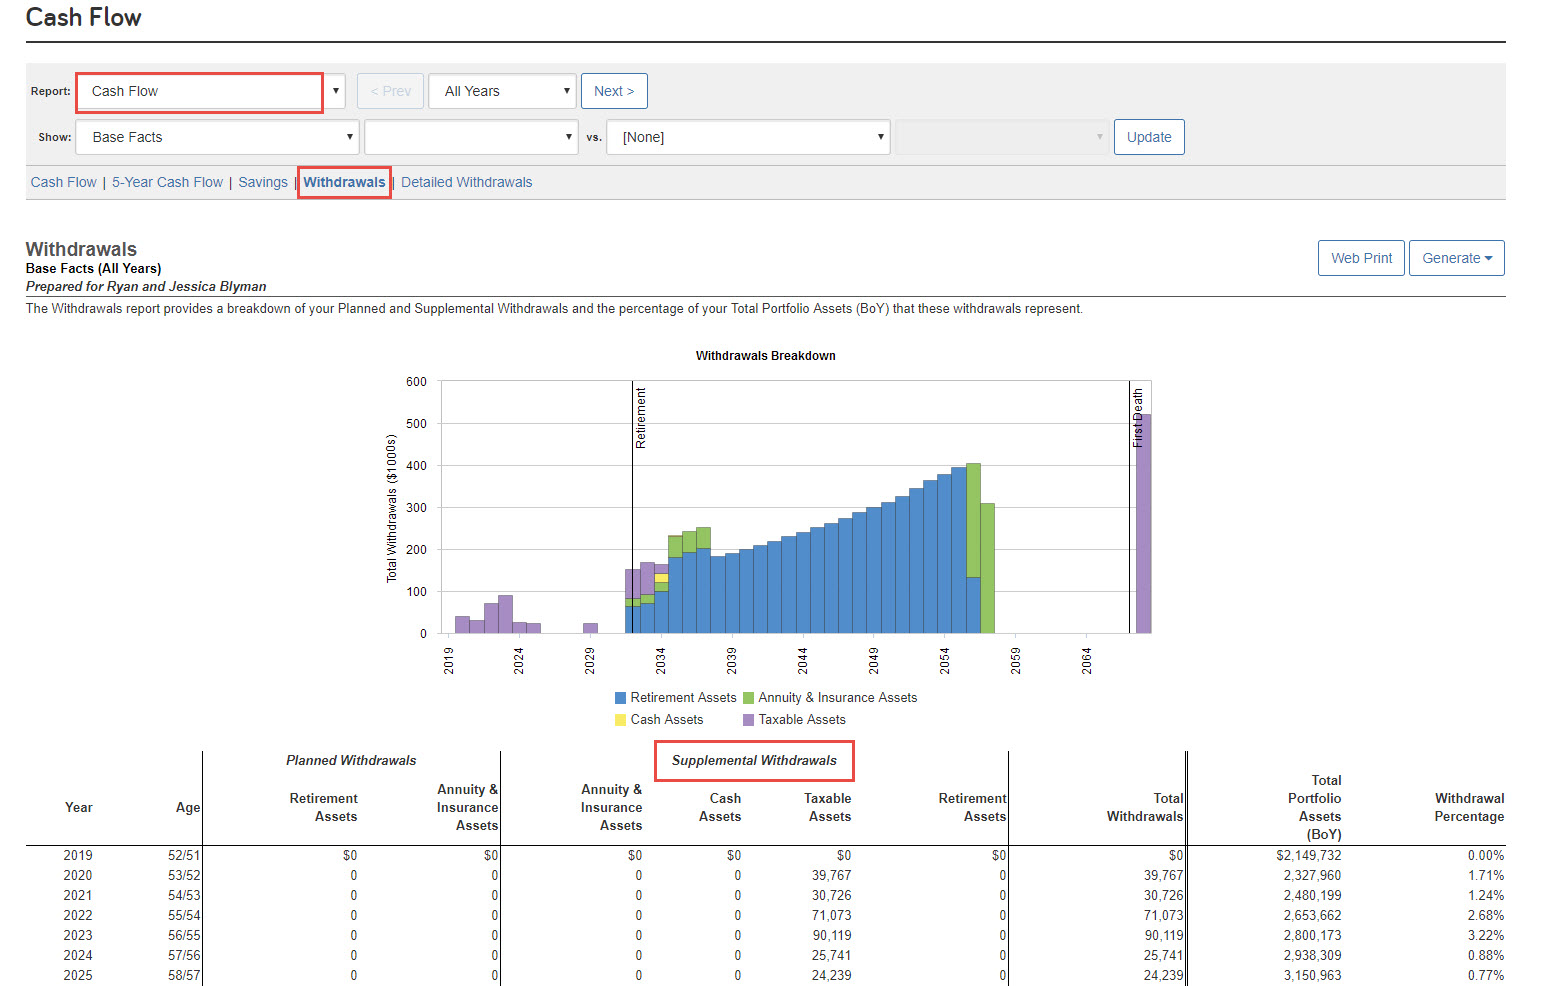
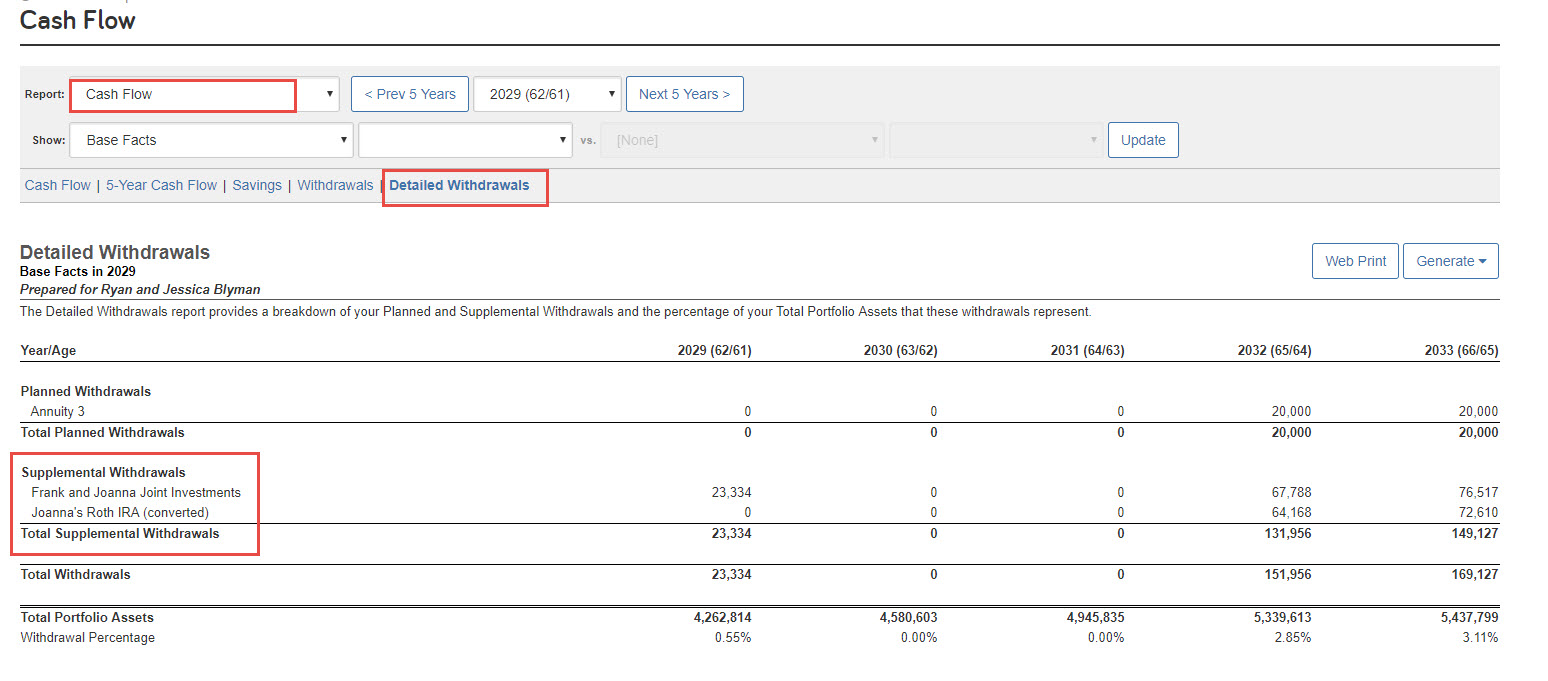
Now it’s time to see your liquidation strategy in action. You will want to use the Withdrawals and Detailed Withdrawals sub-reports in the Cash Flow report. These reports will show you the supplemental withdrawals in the years with negative net cash flow and which assets are being used to cover the deficit helping to answer any client’s questions!