
for expert insights on the most pressing topics financial professionals are facing today.
Learn MoreEntering a Roth conversion just got a little simpler! It is now easier to show the tax diversification benefits Roth accounts give to clients.
Now you can stop building complicated transfer flows between traditional and Roth accounts and model them directly in Roth Conversions, available under Savings & Transfers in Advanced Facts.
While existing transfers created to model a Roth conversion will continue to work, new Roth conversions will be much easier to perform. Additionally, the new Facts will support future releases with more Roth options that will not be available via transfers.
Watch the video above from our in-app Help menu to see how this new feature works, and how to implement it with your clients!
Note: If you use the new Roth Conversions facts to replace already-created Transfer Flows, remember to delete the existing transfers.

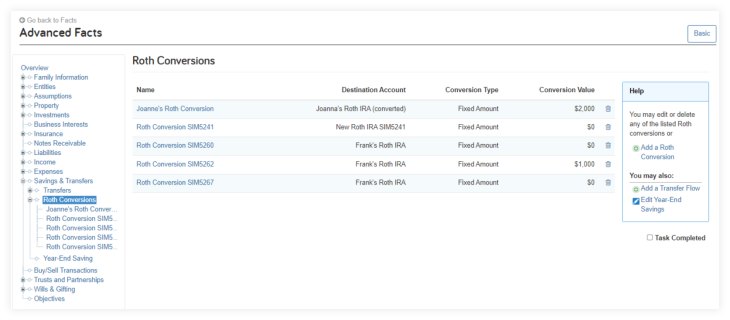
Roth conversions are located under the Savings & Transfers menu. Here you can add new conversions or delete previous conversions.
The Basic button is where you will enter the data to create the Roth conversion. First, name the conversion, enter a start date and an end date, and then follow the next steps:
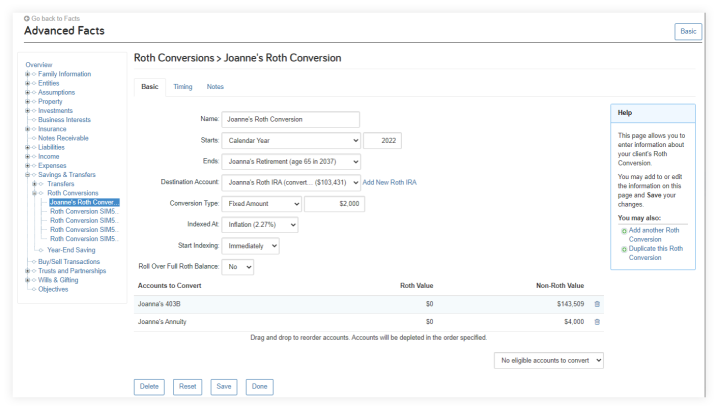
The Destination Account field will list the available Roth IRA accounts. If needed, you can create a Roth IRA by using the ‘Add New Roth IRA’ link beside the Destination Account field.

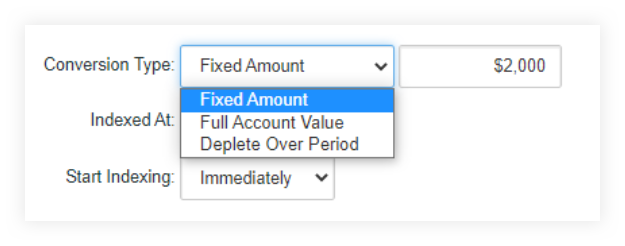
The Conversion Type field has three options:
The Accounts to Convert section of the Roth Conversion form allows you to add available qualified retirement accounts and qualified annuities as source accounts. The Accounts to Convert must be associated with the same owner of the selected Destination Account.
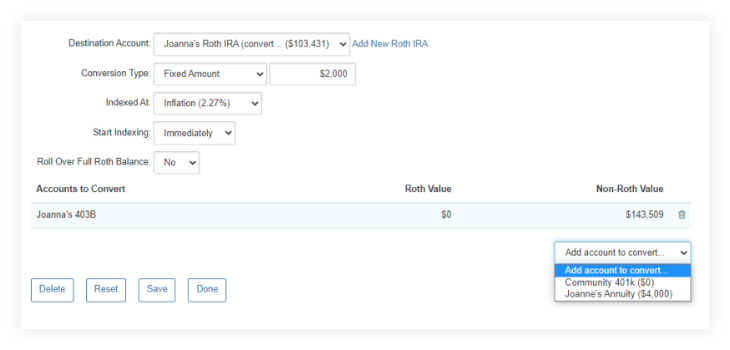
When all the desired accounts to convert have been selected, they will be listed in the Accounts to Convert section of the form displaying the Roth and non-Roth values for each. You can drag and drop these accounts to change the order. The top account will be the primary source of funds to be converted first across all the accounts provided.
Accounts that have been selected can also be removed from the list by using the trash can icon for each account. If no more accounts are available to be converted, the Add accounts to convert menu will state No eligible accounts to convert.

To add a new Roth conversion, select Roth Conversion in the Add a new: menu under Transfers > Roth Conversion. Adding a new Roth Conversion to a plan uses the same form as Fact Finder.
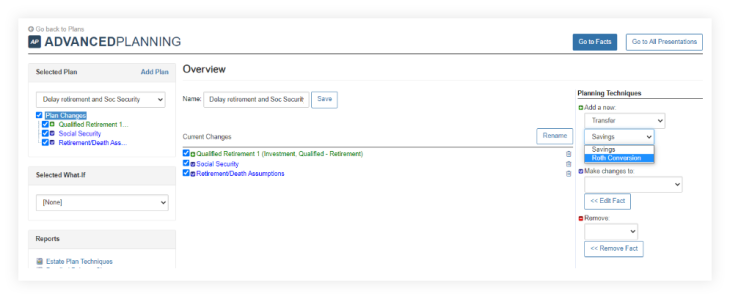
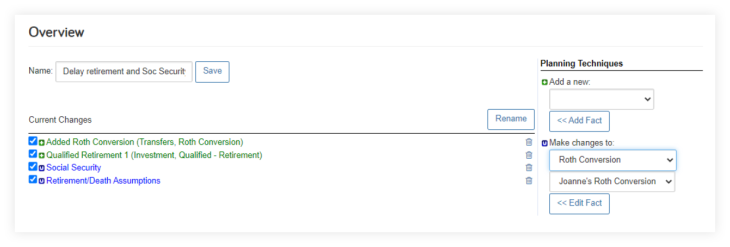
To modify or update a Roth conversion in a plan, select Roth Conversion under the Make changes to field. Select the desired Roth conversion from the list provided. Click the << Edit Fact button.
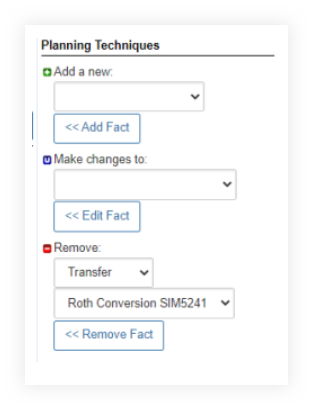
To delete a Roth conversion from a plan, select Transfer under the Remove heading. Select the Roth conversion to delete from the list provided. Click the << Remove Fact button and then Done on the read-only form page displayed.
Coming next month, we will have a new Total Taxes Report within the Decision Center! Keep an eye on our Product Update page for release information.
Additional Resources from the Help menu: