
for expert insights on the most pressing topics financial professionals are facing today.
Learn MoreConnections are a great way for advisors and clients to input and track assets and liabilities in real-time.
Get started by connecting the advisor-based accounts you manage for your clients. Once these managed accounts are connected, encourage your client to log in to their Client Site and complete their financial picture by connecting their remaining personal accounts—such as credit cards or car loans.
Let’s review how to add advisor and client connections, how to keep them up-to-date, and what to do when a connection breaks.
Note: Additional resources are available at the end of the post, including our Connections FAQ and a client-facing user guide.
To add an advisor-based connection, click on Connections in the top blue navigation bar.
In the top right corner of your screen, click on Add Connection and then select Advisor Managed in the pop-up window and click next.
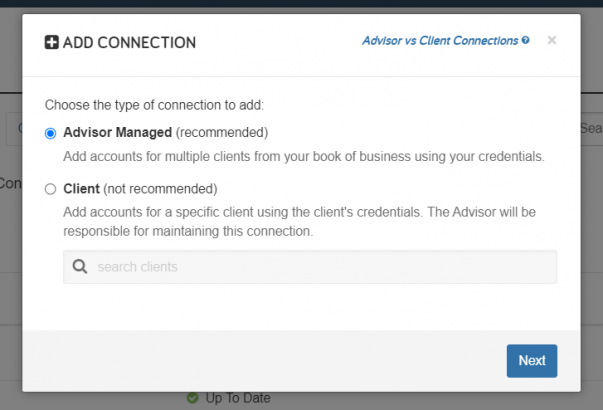
This is where you will search for the institution through which you view your client’s accounts such as Fidelity, Equitable, LPL, etc.
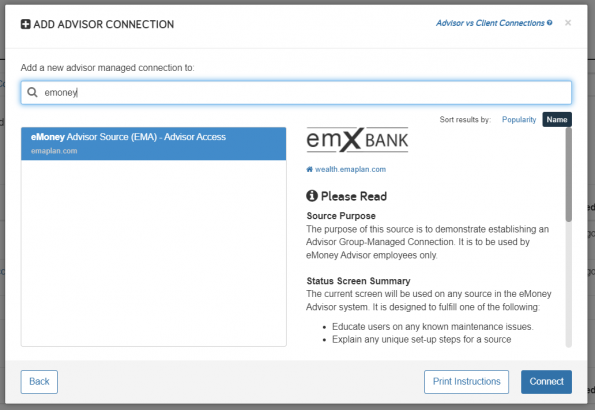
Start by searching for the name of the institution you are adding and suggested options will appear in the window on the left. When you select the appropriate option you will see more details provided to the right. Please take time to read everything for each connection you are adding to see if any additional work will need to be done to add the connection, and what information is needed to establish the connection.
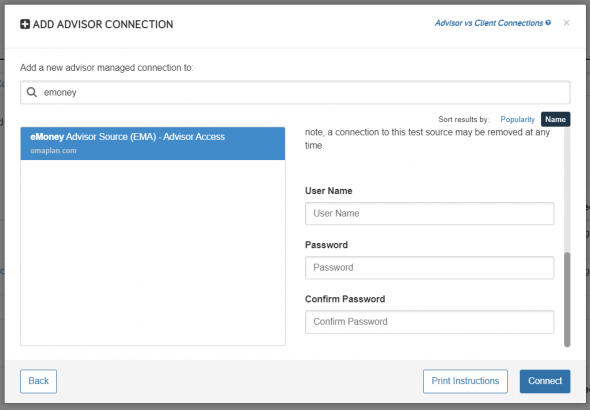
For this example, the connection is looking for a username and password. Enter that information and click Connect.
Once the connection is successfully established you will see the Connections Details page.
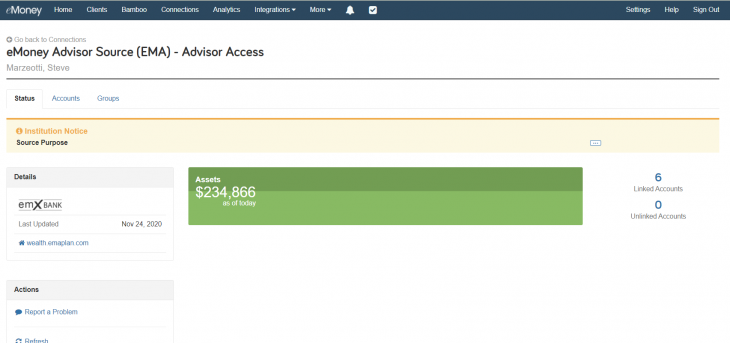
This page provides the status of the connection, a way to view all the accounts, or enter groups if needed.
Click on the Accounts tab, next to Status, to start adding your client’s accounts and connect those accounts to the client profile.
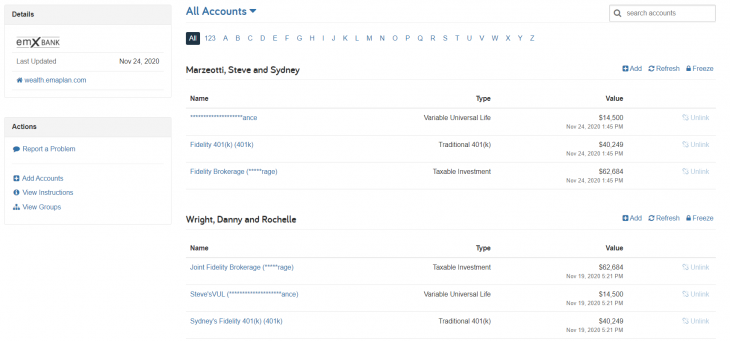
Click Add, to the right of the client’s name, to connect additional accounts. Here you can also Refresh to pull in the most up-to-date account values or Freeze to lock in the account values for your plan ahead of a client meeting.
You may be asked for more information about the client accounts to complete the connection. For this connection, you must include the client’s TaxID. Enter that information and click Next.
The new accounts will appear under the client.
If you are adding accounts to a new client that isn’t currently listed you will see an Actions box on the left of the screen.
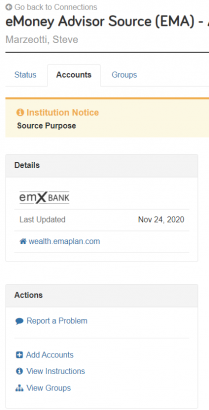
Select +Add Accounts and the connection will ask what client you are looking for.

Start typing in your client’s name until you see them come up.

Select the client and click Next and you will again be asked for the client’s identifier—their TaxID, SSN, Account number, etc.

Enter that information and click Next and the accounts will connect.
If you run into any issues while adding advisor-based connections, our Customer Service team is happy to help troubleshoot and make sure you are doing everything correctly. They can be reached at 888-362-8482, Monday through Friday, from 8:00 a.m. to 8:00 p.m. ET.
Navigate to the client overview page where you will see a globe icon in the upper right corner.

If you have not yet set up the client’s website, do this first so your client can add their connections.
We recommend your clients add their own connections through the client site. This ensures the client can fix any connections that break.
They should only add connections when logged in with their credentials. Avoid adding these connections through your advisor access, even when viewing the client site on their behalf.
When the client is logged into their client site they will see the following as their dashboard. Have your client navigate to the Organizer tab at the top navigation bar.
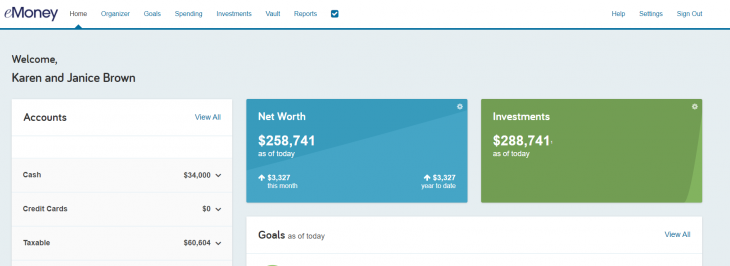
They will then select Accounts to the left.
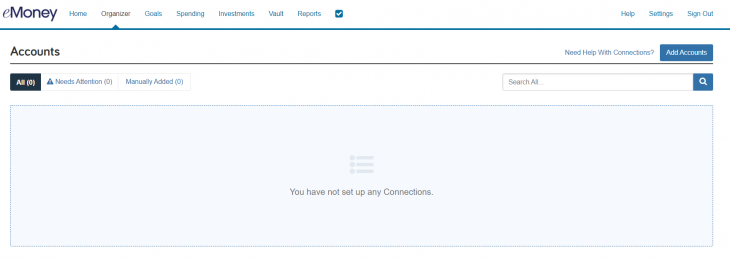
Any advisor-managed accounts you added can be viewed here by the client. If not, the client will see this blank screen, and they can start adding accounts by clicking Add Accounts in the top right blue box.

Here the client can search for banks such as Wells Fargo, to bring over checking, savings, credit cards, and other accounts they own at Wells Fargo.
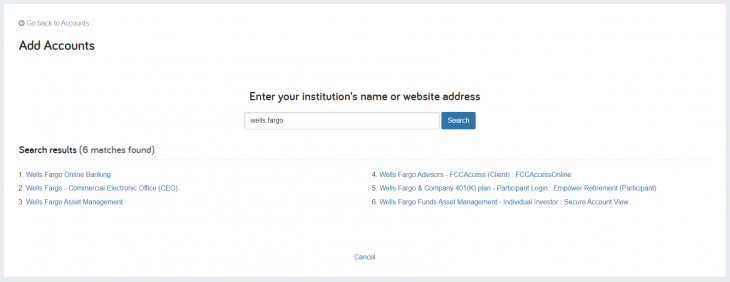
All the available client connections for Wells Fargo will come up once they click Search.
The client will then select the one that applies to the accounts they are looking for. For example, if they are looking for checking, savings, and credit cards they will select number one.

If there is important information the client should know about the connection, it will come up once they click on the institution. If all looks good, they can click Continue.

This is a great example of our API-based connection. Once the client clicks Connect, they will be redirected to the Wells Fargo website to confirm authorization of Wells Fargo bank information to be used on eMoney. The client will click Connect to go to the next steps.

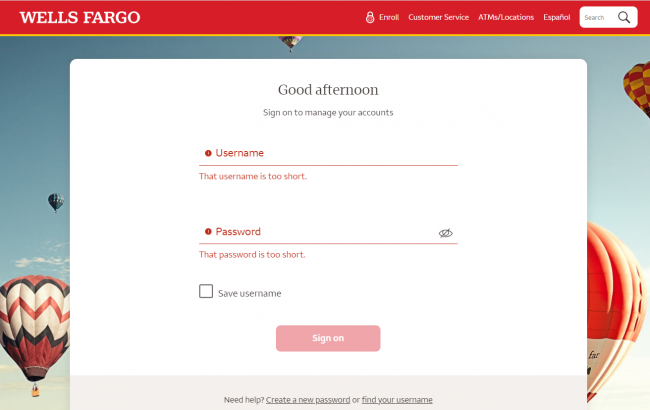
The Wells Fargo website will load, asking the client to input their username and password that they use to log in to view accounts at Wells Fargo.
Once the username and password are entered, the client will click Sign-On.
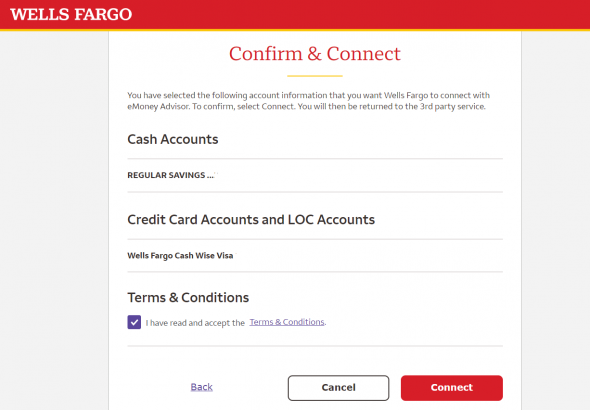
They will be asked to select the accounts they want to connect, agree to the terms and conditions, and click Connect.
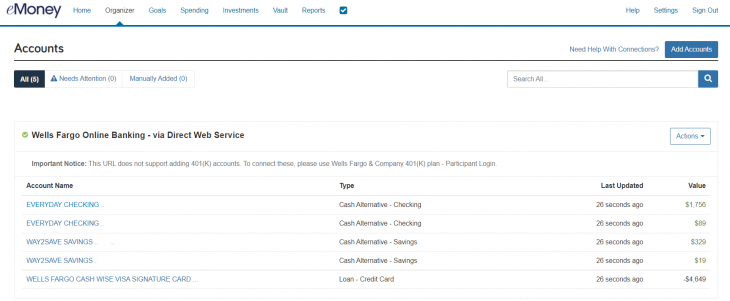
The client will then see the accounts they connected on their eMoney client site.
Remember, the above describes an API-based connection. Not all our connections are API. For example, when connecting American Express accounts, if the client wishes to connect multiple accounts, they will follow the same steps, but instead of logging directly into the institution, they will see a page similar to this:
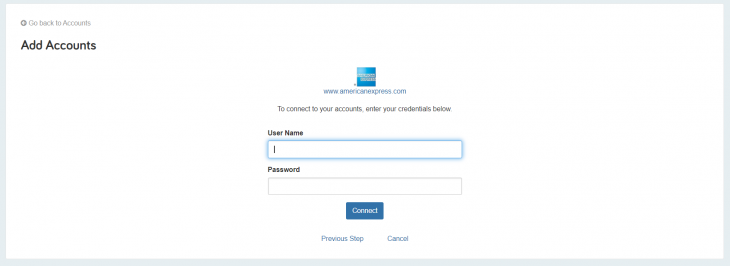
Ask the client to enter their American Express username and password and click Connect.
Once the connections are verified, the accounts will be displayed on their client site.
As their advisor, you will also see any accounts they add on their client site under their facts.

One of the benefits of utilizing connections is ensuring your clients’ most current account values are used in their financial plan. However, after connecting accounts, there is some required maintenance.
To help clients gain a clear picture of the health and status of their connections, we’ve simplified the client site account view to easily identify connections that may need attention.
Share this guide to help communicate this change to your clients.
From an advisor standpoint, you can check on your accounts and make sure they are free from errors by clicking on Connections in the top blue navigation bar, and then clicking on Connection Status.
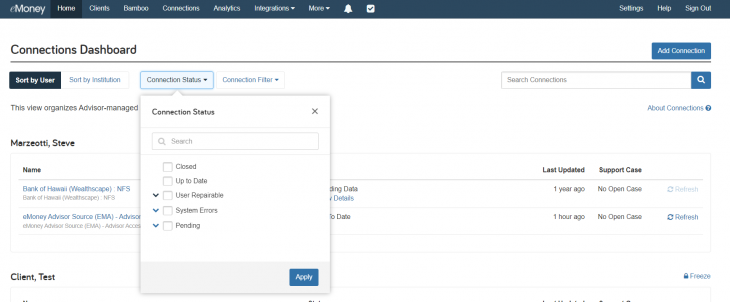
From there you can check and see if any of your accounts show any errors.
If a connection is in an error state, you will notice a red exclamation point next to the status.

Click on the name of the connection and you will be taken to the error page.

For this one, the connection is displaying a general error. General errors typically don’t provide a lot of troubleshooting options for the advisor so it is best to report a problem to our data support team for them to review. To do this, click on the blue box labeled, Report a Problem.
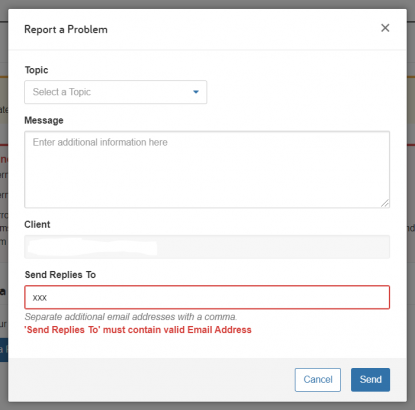
Fill in the box with the topic and a message to our data support team. The client name will fill automatically and the Send Replies To box will fill with your email address however if you want to add a support user or an assistant to also receive replies, fill in their email in addition to yours. And then click Send. This message goes to our team to review, and once they have additional information they will reach out via email.
The most common client connection error is Credentials Needed.
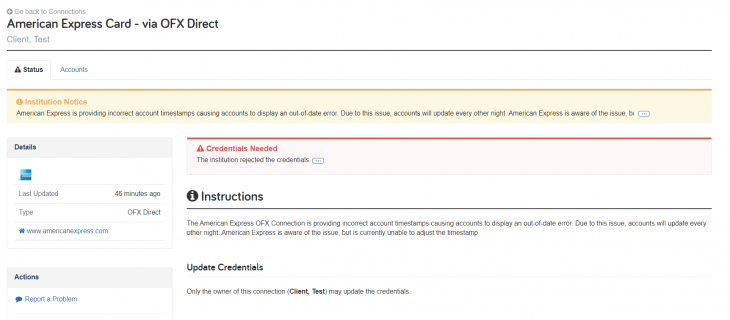
As the advisor you can see this connection is in an error state because the client needs to update their credentials. Because the client made this connection on their client site, it must be fixed on their client site. Inform the client that they need to log in to their client site, locate the account, and fix the connection as follows.
Click Organizer.
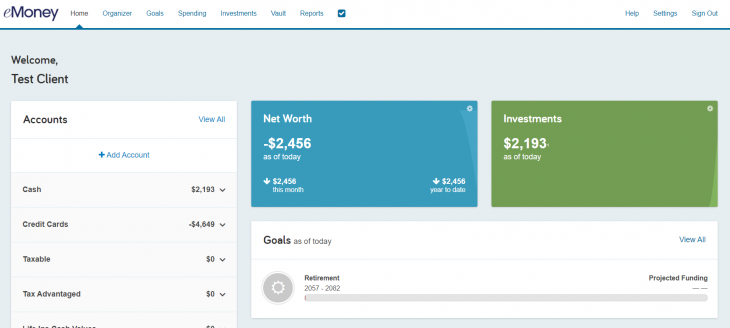
Then click Accounts.

Locate the connection with the error.

Select Repair on the right.
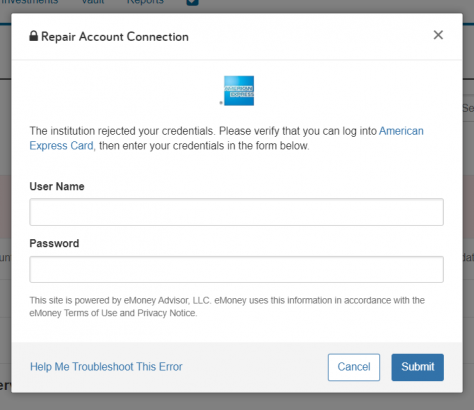
This box will pop up asking for their username and password. Once completed, click Submit.
If the new credentials work, the client will see their accounts update.
While a client cannot call our customer support with any connection issues they are having, they can reach out to you as their advisor and you can call 888-362-8482 from 8:00 a.m. to 8:00 p.m. ET, Monday through Friday, and an eMoney Specialist will help you navigate through the connections process. You can also email our customer service team at customerservice@emoneyadvisor.com.