for expert insights on the most pressing topics financial professionals are facing today.
Learn MoreClient Connections not only help you see accounts held away they also give clients access to all their accounts in one place with automatic updates of account values.
Today, we’ll look at how to help your clients add and troubleshoot connections so you both have an accurate and up-to-date view of their current financial status.
After registering for the Client Portal, the next step in the client onboarding process is to add data. Clients can do this in two ways—by adding manual facts or by connecting their accounts held away using Client Connections.
To add a connection, instruct clients to follow the steps below:
To help your clients in the setup process, share these helpful tips below and the Add Accounts user guide.
Select the right connection. When clients search for an institution, there may be more than one connection that matches their search. For example, searching for Fidelity will result in Fidelity Investments, Fidelity Benefits, and Fidelity Bank connections. Make sure they are not only checking the connection name but the associated URL too.
Test your credentials. Before adding the connection on the Client Portal, have clients log into the financial institution to make sure their credentials are up-to-date. For example, they may need to reset an expired password.
Read institution notices. After choosing a connection from the list, an institution notice may appear. This notice will inform clients of any important information relating to this institution’s connection. They will need to click Continue to proceed to the next step.
Follow additional security steps. Some institutions will require additional security steps before connecting accounts. The client will be prompted to enter an access code or answer security questions. Additional security features and prompts come directly from the institution.
Check out our Client Connection Resources post for more information on how to introduce data aggregation to your clients.
One of the benefits of utilizing connections is ensuring that your clients’ most current account values are used in their financial plan. However, after connecting accounts, there is some required maintenance.
To help clients gain a clear picture of the health and status of their connections, we’ve simplified the Client Site account view to easily identify connections that may need attention.
Share this guide to help communicate this change to your clients.
New color-coded institution statuses will help your clients easily identify connections that they can repair, such as by updating credentials (in red), versus errors that are outside their control, such as institution errors (in yellow).
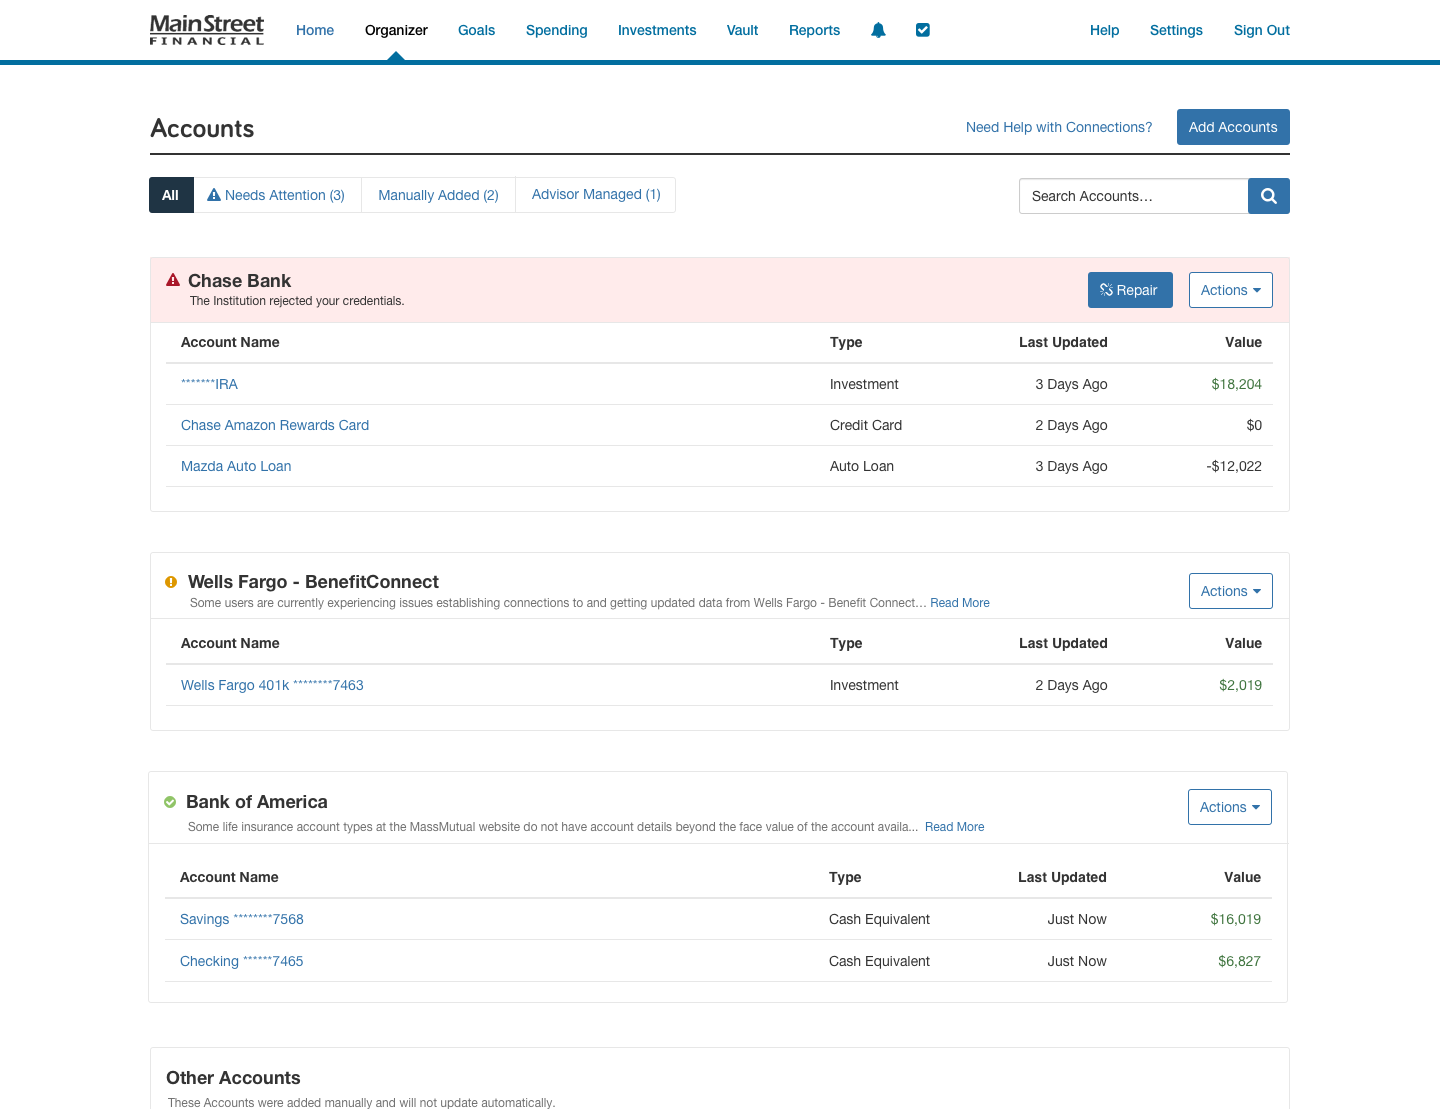
Account filters allow you and your clients can easily identify connections with errors that are actionable. Clients will even have more insight into manual and advisor-managed accounts.
Filter by:

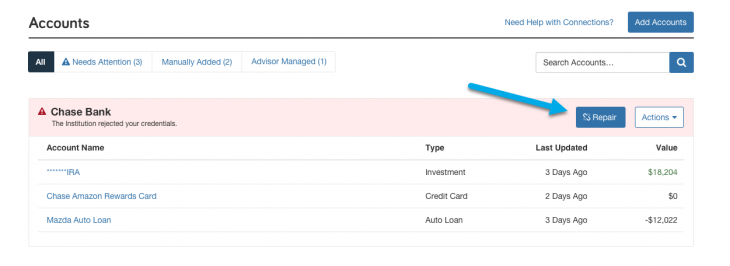
The red connection status makes it easier than ever for clients to identify and troubleshoot connections with user fixable errors—such as updating credentials, access codes, and security questions.
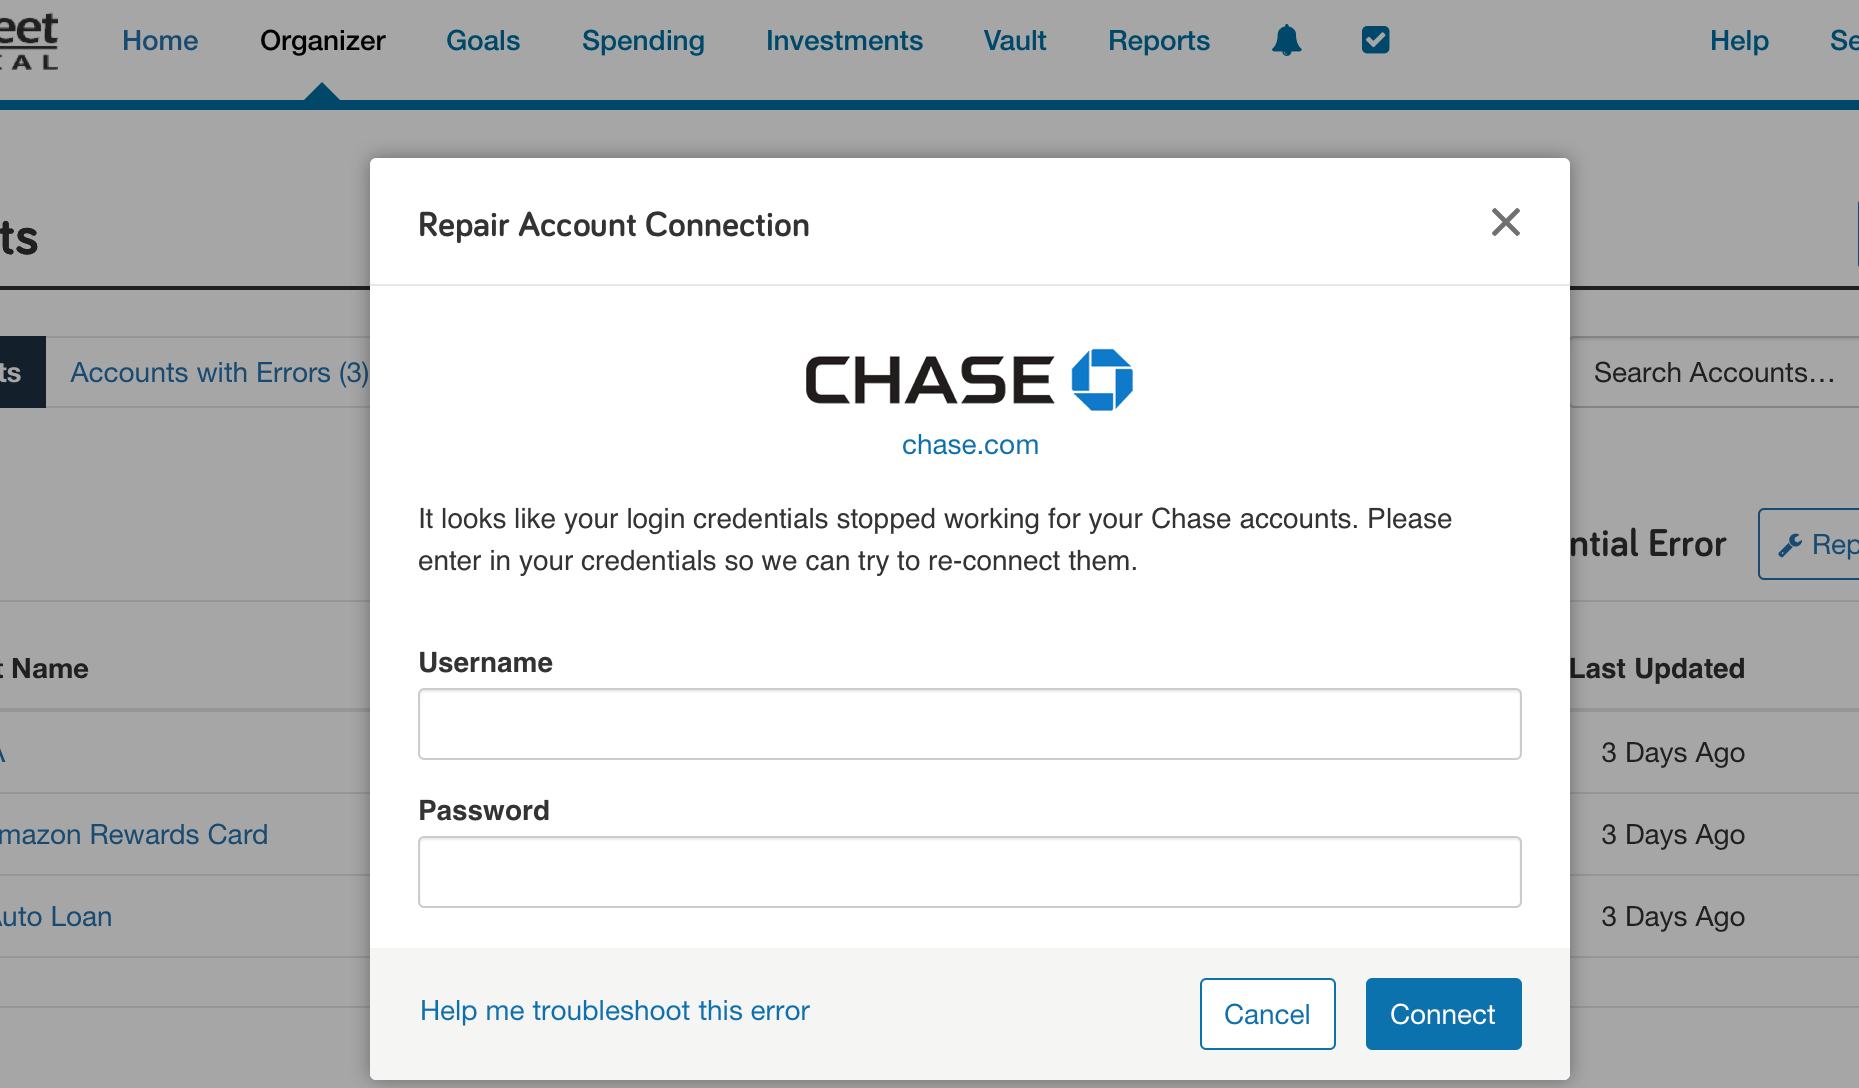
When an account is in a fixable error state the Repair button will appear. Click this button to initiate the troubleshooting modal.
The troubleshooting modal will provide you with the next steps on how to fix the connection error.
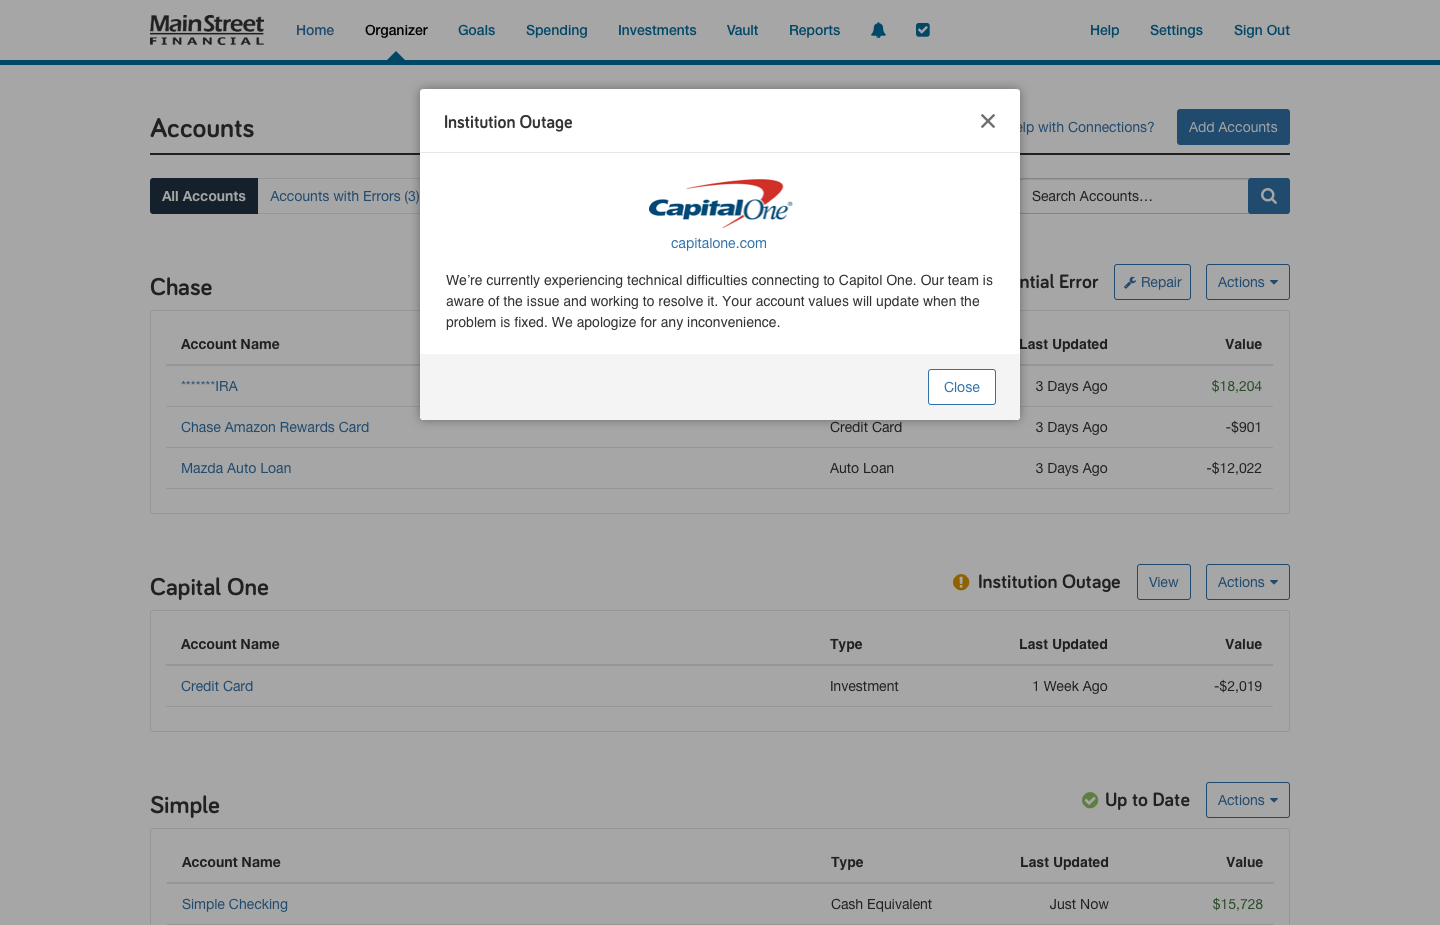
Institutional outages and technical issues where there is nothing for them to correct will appear with yellow statuses. In these cases check if the status includes details around how we’re working with the institution to correct this issue before opening a support request.
If you are unable to correct the error following these steps, switch to your advisors access and Report a Problem on the Connection to notify our data support team.