for expert insights on the most pressing topics financial professionals are facing today.
Learn MoreProviding clients their very own personal financial website offers them an interactive tool to monitor their wealth 24/7, but did you know that you can easily customize their client site to include a unique set of available features? Known as Client Site Defaults, they’re easy to customize and can be done globally or on a client-by-client basis.
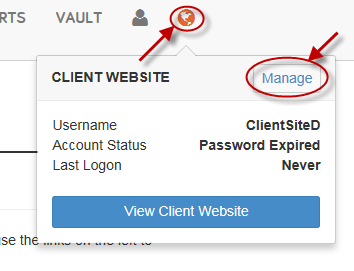
To get started, head to the Client Overview section of any client. From there, click the globe icon in the top-right corner and select Manage.
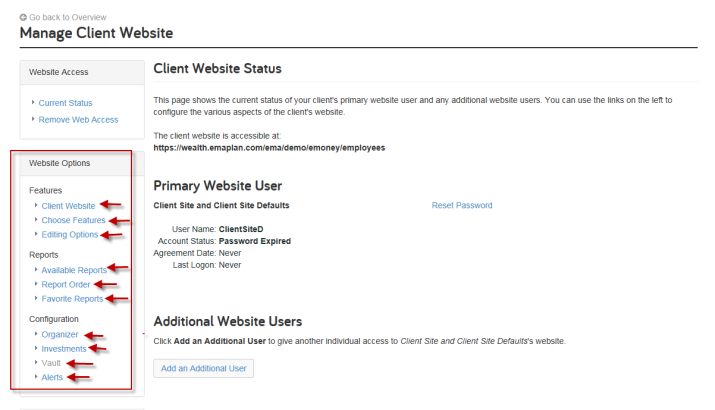
Client Site Defaults are categorized under Website Options. The available hyperlinks expand each category to display the defaults for the selected area.
The first group of Website Options is the Features section, which consists of 3 sub-groups: Client Website, Choose Features, and Editing Options. They allow you to change the website’s theme, customize primary features, and restrict connections.
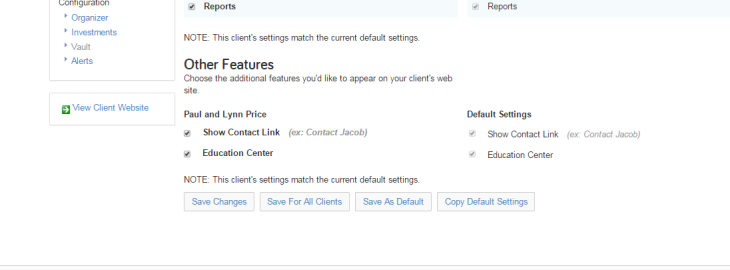
The second group of Website Options is the Reports section. Here, you can choose which reports to include in the website, the order of the reports, and which reports to include in the Favorite Reports section.
The third and final group is the Configuration section. The four available options (Organizer, Investments, Vault, and Alerts) give you the ability to customize what reports are a part of the website’s organizer, how investments are viewed, any vault restrictions, and which alerts will be seen.
Once you make changes to a section, you can save them by one of several ways. The first is to select Save Changes. This saves your changes for this client only. You can also select Save For All Clients. This saves your changes for all existing clients. The Third option is to select Save As Default. This saves your changes as the new default setting for all new client sites. The fourth and final option is the select Copy Default Settings. This replaces your current client’s settings to their original default settings.